
← Sewing glossary

Machine feature

Thread Cutter

A built-in blade or powered mechanism that trims upper thread, bobbin thread, or both at the end of sewing.

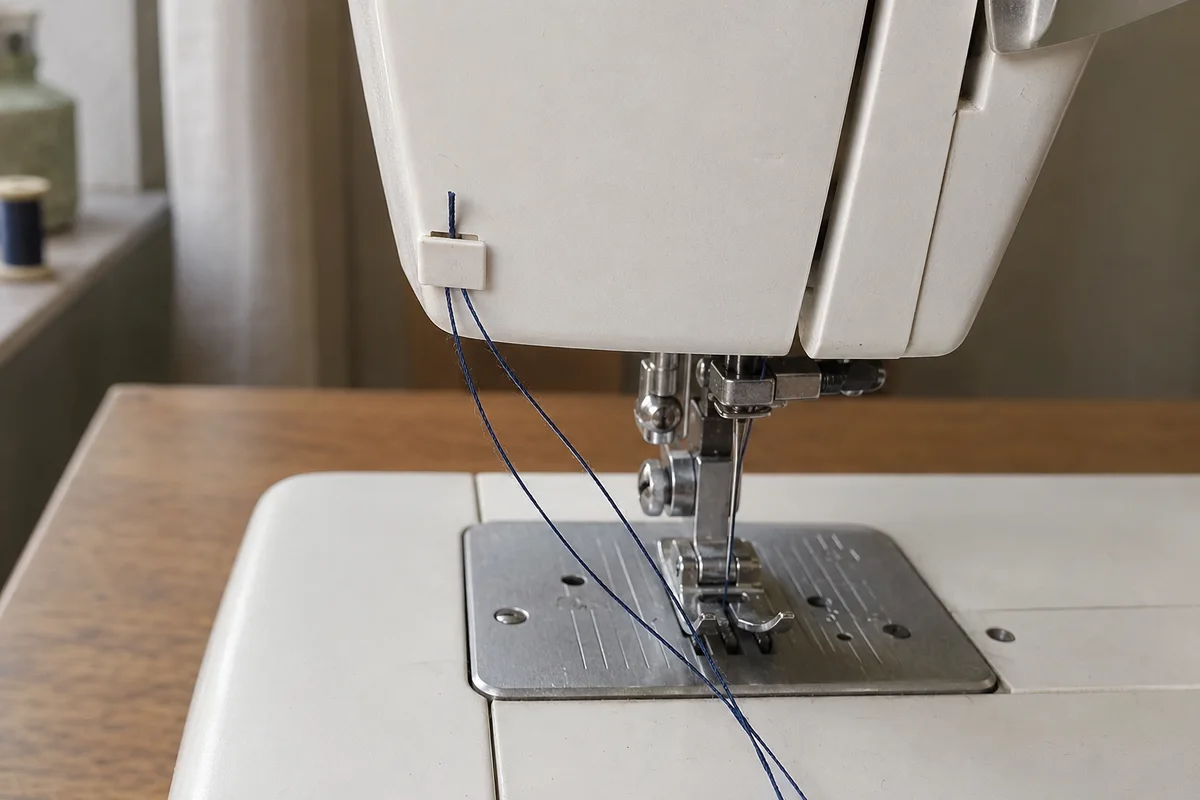
Two navy thread tails drawn through a compact guarded metal thread cutter on the left side of a domestic sewing machine
A compact side-mounted manual thread cutter in use. The upper and bobbin thread tails are guided together beneath the small protective housing and across its concealed metal cutting edge. This trims both threads without requiring separate scissors at the machine.
01

Manual cutters

Draw the thread into the fixed blade in the direction shown by the machine. Leave enough tail for the next seam and avoid dragging fabric or very heavy cord through a cutter designed for ordinary sewing thread.

02

Automatic cutting

Stop sewing before pressing the cutter control. The machine completes a programmed movement, trims threads beneath the plate, and may leave the needle in a preset position. Do not press repeatedly during a jam.

03

When cutting becomes incomplete

Lint, short tangled tails, unsuitable heavy thread, a dull or damaged blade, or a displaced cutting assembly can leave one strand attached. Clean only the areas permitted by the manual before seeking service.

Useful distinction

A cutter is not a seam lock

Trimming removes excess thread but does not secure every seam. Backstitch, tie off, or use the machine’s locking function when the construction requires it.

Practical guide

Use each cutter within the thread path it was designed for

A manual side blade and an automatic under-plate cutter perform different jobs. Clean cutting depends on the correct operating sequence, adequate thread tails, suitable thread, and a lint-free mechanism.

Use a fixed manual blade deliberately

Raise the presser foot and draw both threads into the blade in the direction shown by the machine. Keep fingers clear and pull with steady light tension. If the edge repeatedly frays rather than cuts, use scissors and replace the approved blade instead of forcing thread against it.

Let an automatic cycle finish

Stop sewing with the needle in the position required by the manual, press the cutter control once, and wait until all movement ends before raising the foot or pulling the work away. Interrupting the cycle can leave short tails, a partial cut, or thread trapped around the cutter.

Know the material limits

Very thick, bonded, metallic, or multiple decorative threads may exceed an automatic cutter’s rating. Check the manual and trim unsupported combinations by hand. Automatic cutting may also be disabled with certain feet, needle modes, or embroidery operations.

Respond to incomplete cuts

Remove the work without force, switch off power, and clear accessible lint and short thread pieces as instructed. Rethread and test ordinary thread. Repeated clicking, jams, or failure with a clean supported setup may indicate a dull blade or alignment problem requiring service.

Avoidable mistakes

Cutter habits that shorten tails or jam the mechanism

  • Pulling the fabric away before an automatic cycle ends tightens thread against moving parts.
  • Repeatedly pressing the button does not clear a physical obstruction.
  • Using unsupported heavy thread can nick or stall a fine cutter.
  • Oil placed on a cutter without instructions can hold lint inside the assembly.

Common questions

Thread Cutter FAQs

Why does the automatic cutter leave one thread uncut?

Lint, thread caught in the hook area, heavy thread, a worn blade, or incomplete machine movement may prevent a full cut. Stop and inspect safely.

Can I use the cutter on thick decorative thread?

Only if the manual allows that thread range. Heavy cord can dull, jam, or displace a cutter intended for standard thread.

Why are the remaining tails very short?

Automatic systems are designed to trim close. Hold or use a leader when the next seam begins at an edge that may pull short tails into the plate.

Should I sharpen a built-in cutter blade myself?

Usually no. Small fixed and automatic blades are safer to replace with the correct part and model-specific procedure.