

Start Here
Halloween project ideas at a glance
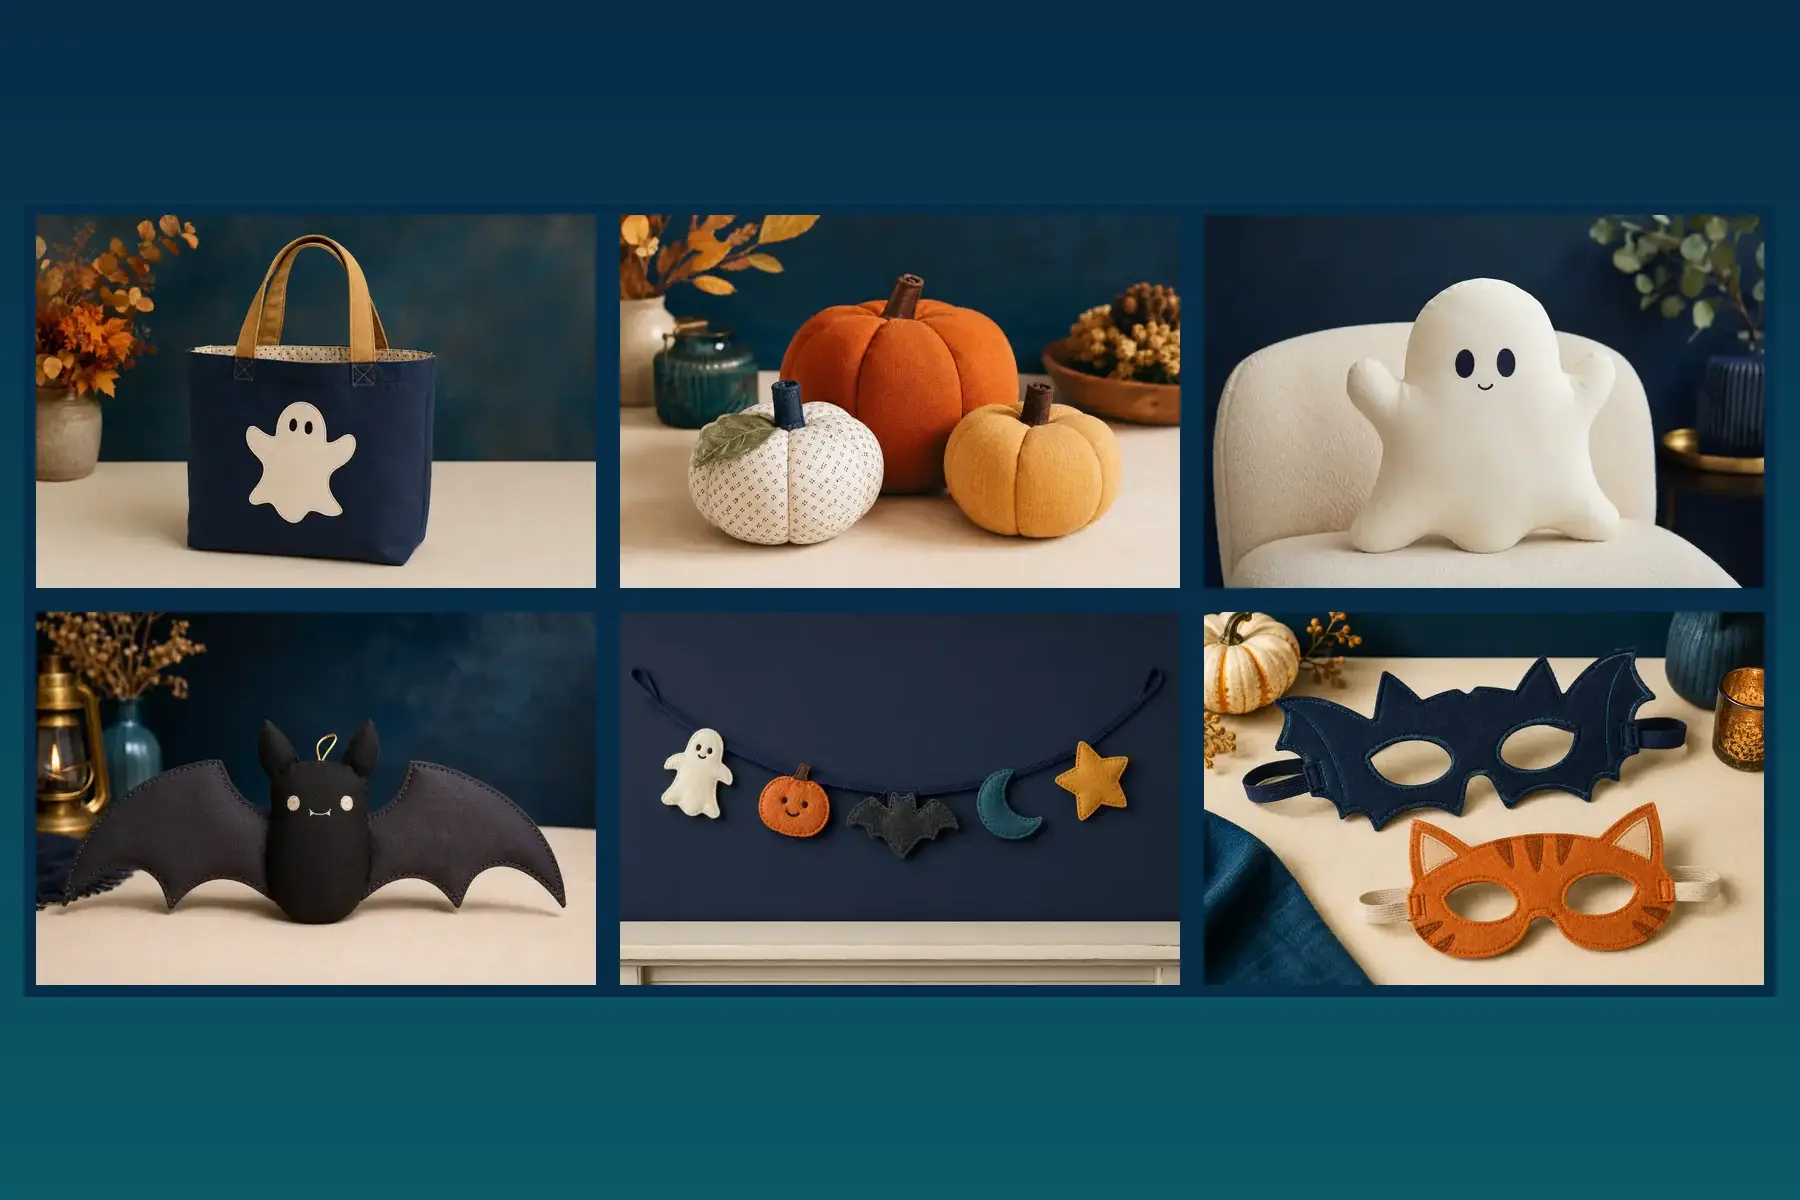
Compare the materials and skill level before choosing an idea. Tap any picture to open a larger view, then use the corresponding guide below to plan the project.
About the pictures: the images are visual inspiration for the finished style. Your result will vary with fabric weight, seam width, stuffing, dimensions, and individual sewing.
Before cutting your fabric
Decide the finished dimensions and make a small paper or scrap-fabric test for shaped projects.
Add an appropriate seam allowance to every piece that will be sewn right sides together.
Mark turning openings, placement points, and the right side of similar-looking pieces.
Read the complete sewing order once before starting.
Prewash washable woven fabric if the finished project may be laundered.
Project 1
Reusable trick-or-treat bag
This lined tote is the most practical project in the collection. Its rectangular pieces make it easy to resize, while the lining, boxed corners, reinforced handles, and optional appliqué give it a polished finish.
How to sew it
- Cut matching outer and lining rectangles for your chosen finished size, adding seam allowance around every sewn edge. Fuse interfacing to the wrong side of the outer fabric if the cotton needs more body.
- Add the ghost, pumpkin, or bat appliqué before constructing the bag. Keep all decorative stitching clear of the seam allowances.
- Sew the outer side and lower seams, then repeat for the lining while leaving a turning opening in the lining base.
- Form the optional boxed corners by matching each side seam to the base seam. Sew across the marked depth and trim evenly.
- Baste both handles to the bag exterior at the placement marks, checking that neither handle is twisted.
- Join the lining to the outer bag around the upper edge, turn through the lining, close the opening, and topstitch the rim. Reinforce each handle with a stitched rectangle and X.
Project 2
Six-panel fabric pumpkins in three sizes
A panelled pumpkin has a more rounded, deliberate shape than a gathered fabric tube. Use six matching panels for a calm finish or alternate similar-weight prints. Stable woven cotton is easier to align and press than stretch velvet for a first version.
How to sew it
- Cut six identical panels with the grainline running from top to bottom. Transfer the opening marks to one pair.
- Join the panels right sides together along one curved edge at a time. Start and stop at the exact panel points so the top and base do not develop a hole.
- Sew the first panel to the last, leaving the marked opening. Clip the deepest curves, turn, and fill gradually.
- Close the opening with ladder stitch. Pass strong thread between the top and bottom centers and pull gently to flatten the sphere into a pumpkin shape.
- Sew and turn the fabric stem, stuff it lightly, and attach it with the felt leaf over the top center.
Project 3
Friendly ghost mini pillow or shelf softie
A ghost with broad curves is easier to sew and turn than one with narrow fingers or pointed tails. Sketch half of the silhouette on folded paper first, cut it open, and use the balanced shape to mark matching front and back pieces.
How to sew it
- Cut matching front and back pieces. Mark the face placement and turning opening before separating the layers.
- Embroider the eyes and mouth on the front. Securely stitched felt is an alternative, but avoid loose buttons on a child’s softie.
- Sew the front and back right sides together, leaving the opening. Clip into the inward curves at the arms and lower scallops without cutting through the seam.
- Turn, shape the curves with a blunt tool, and stuff the arms first. Add filling gradually so the pillow remains soft rather than rigid.
- Close the opening with small ladder stitches and redistribute the stuffing by hand.
Project 4
Mini bat plush with broad wings
This idea uses a softly stuffed oval body with separate double-layer wings and ears. Stable cotton gives the wings a crisp outline, while felt avoids turning narrow points. Low-stretch fleece works well for the body but may need careful feeding to keep the layers aligned.
How to sew it
- Sketch one balanced wing shape and use it to cut two layers for each side. Cut matching body pieces and two layers for each ear.
- Edge-stitch each wing pair and ear pair. Trim uneven edges, keeping the curved lower wing points broad enough to sew neatly.
- Embroider the face on the body front. Baste the wings, ears, and optional folded ribbon loop to the right side of the front with their raw attachment ends facing outward.
- Place the body back over the front, sew around it, and leave a turning opening. Reinforce the seams where the wings join the body.
- Turn the body, add filling gradually, and close the opening by hand. Keep the wings flat rather than stuffing them.
Project 5
Mix-and-match felt Halloween garland
Combine a ghost, pumpkin, bat, crescent moon, and star, or repeat only two or three motifs for a simpler look. Cut each shape once for a flat garland or cut pairs for lightly padded decorations. Felt does not fray, so this is also the easiest hand-sewing project in the collection.
How to sew it
- Trace the shapes onto freezer paper or card if you plan to make several repeats. Cut smooth outlines without shortening the bat wings or star points.
- Embroider faces before joining padded pairs. Blanket-stitch around each pair and add only a pinch of stuffing.
- Lay the cotton tape at full length and arrange the motifs before attaching any of them. Leave at least three inches between shapes.
- Sew each motif firmly to the tape and form a stitched hanging loop at both ends.
- Hang the garland indoors, away from candles, heaters, and any height where children or pets could pull the cord.
Project 6
Layered felt Halloween eye mask
Eye masks must be fitted to the individual wearer rather than made to a generic size. Make a paper fit check first, enlarge the eye openings when needed, and measure the elastic on the wearer. The mask must stay clear of the eyelids and nose.
How to sew it safely
- Sketch the mask on folded paper, cut out the eye openings, and hold the paper gently in place. Confirm clear forward and side vision before cutting felt.
- Cut two felt layers on the fold. Start with the inner eye-opening line, then enlarge it only as needed for the wearer.
- Measure the elastic without pulling it tightly. Add one inch so each end can be enclosed by half an inch between the layers.
- Reinforce each elastic end with a stitched rectangle, then edge-stitch around the mask and both eye openings.
- Check the finished fit again. Do not use the mask if it restricts blinking, breathing, forward vision, or side vision. Children require adult supervision.
Choose fabric for a clean, usable result
Stable quilting cotton is the easiest all-round choice for the bag, pumpkins, ghost, and bat because it cuts accurately and handles curved seams without stretching. Wool-blend or firm craft felt works well for the garland and mask because the edges remain clean without a separate seam finish.
Before using velvet, minky, stretch fleece, or loosely woven costume fabric, test the complete fabric stack on a scrap. The guide to sewing different types of fabric explains how needle choice, presser-foot pressure, and seam finishing change with the material.
Frequently Asked Questions
Halloween sewing project questions
Which Halloween sewing project should a complete beginner start with?
The felt garland is the most forgiving because felt does not fray and the motifs can be stitched by hand. The rectangular trick-or-treat bag is a good first machine-sewn project if you already feel comfortable sewing a straight seam.
Can I make these projects without advanced sewing skills?
Yes. The ideas use familiar beginner techniques such as straight seams, edge-stitching, light stuffing, simple curves, and hand finishing. Start with the garland or bag before trying the shaped soft projects.
Can children make these projects?
Children can help choose fabric, arrange felt shapes, stuff soft projects, and complete suitable supervised stitches. An adult should handle sharp cutting, pressing, machine setup, and mask fitting.
What fabric is easiest for these Halloween projects?
Stable quilting cotton is the easiest all-round option for the bag, pumpkins, ghost, and bat. Firm craft felt is especially convenient for the garland and eye mask because its cut edges do not fray.
Can I sew these projects by hand?
The felt garland and small decorative details are suitable for hand sewing. The bag, pumpkin, pillow, and plush will be quicker and more consistent on a sewing machine, although a patient maker can hand-sew them with short, secure stitches.