

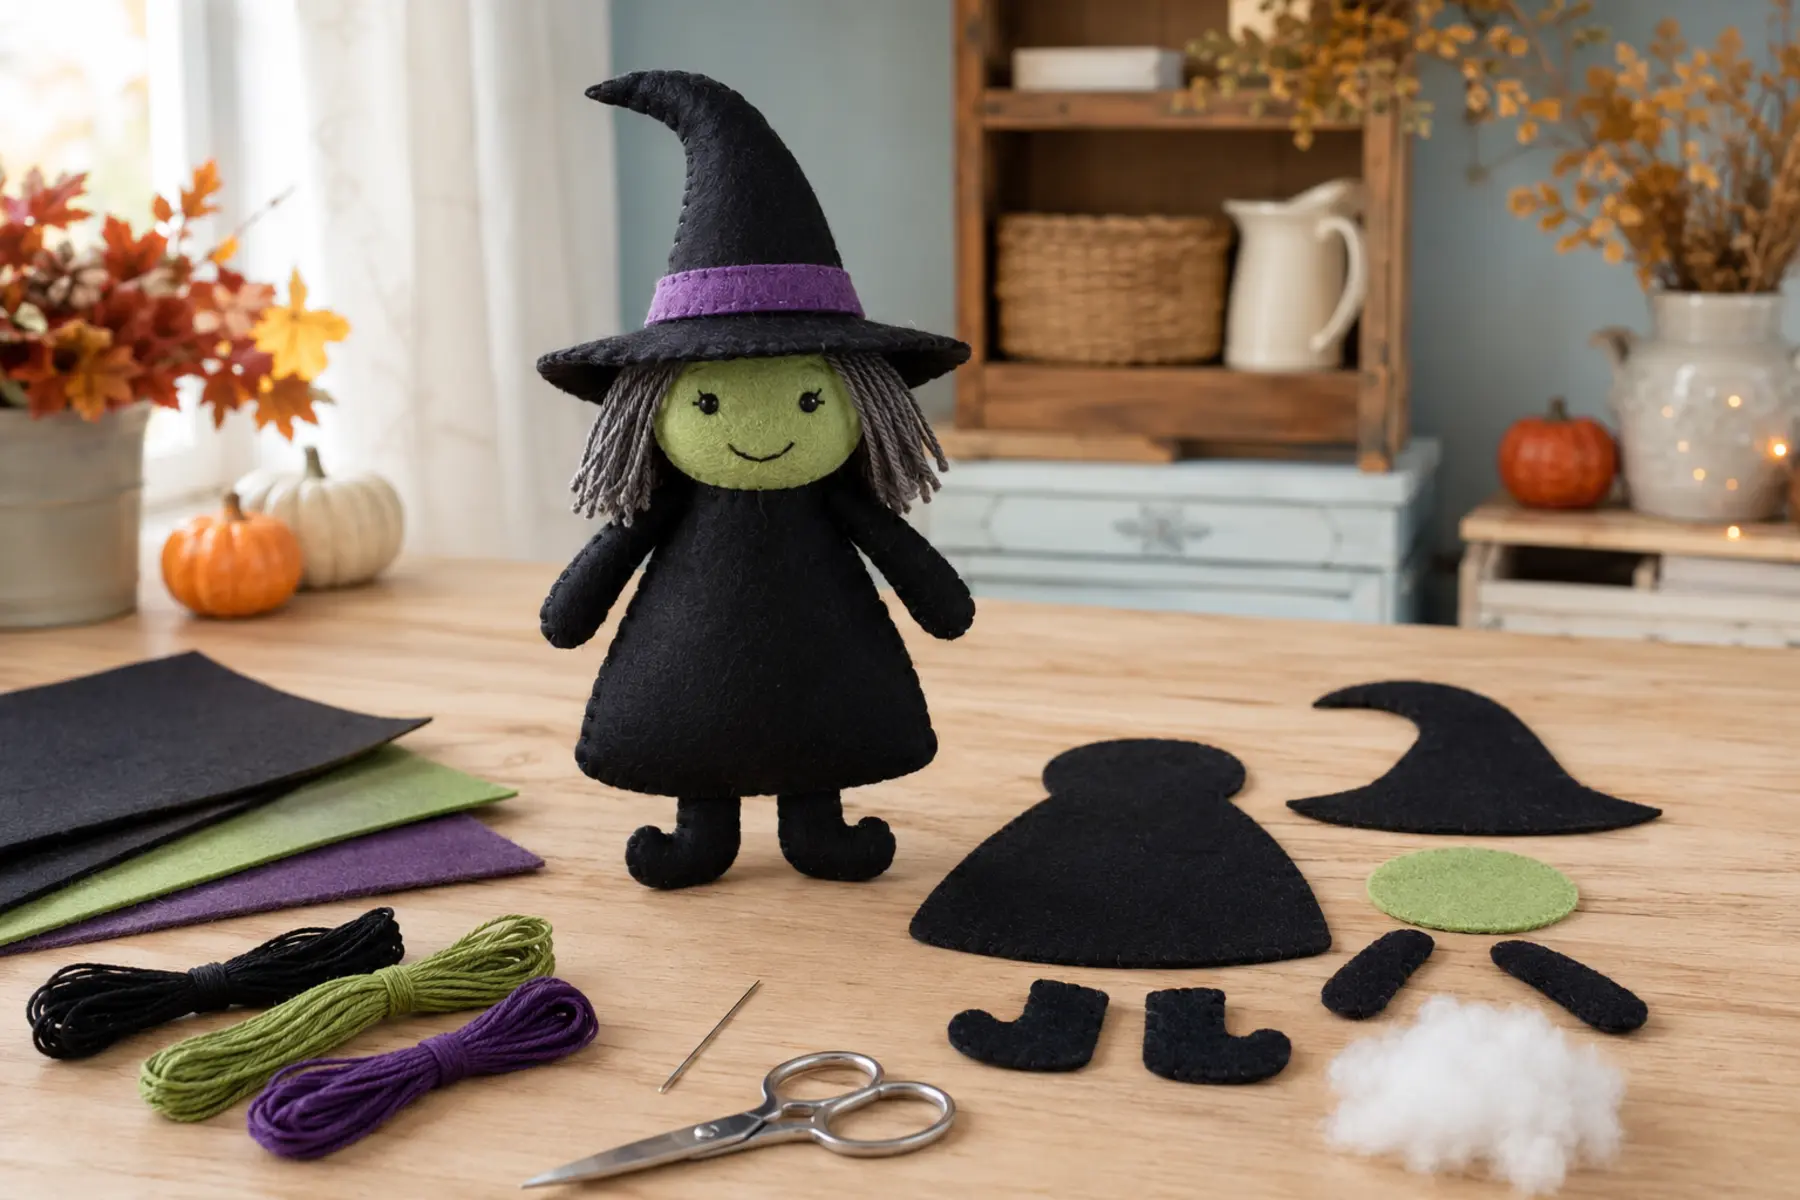
This tutorial owns one specific project: constructing a felt witch doll from basic shapes. It does not repeat the broader collection in Easy Halloween Sewing Project Ideas. Use that roundup when you want to compare several Halloween projects; remain here when you are ready to make the witch.
The finished size is flexible. A doll around 8 to 10 inches tall is large enough for a beginner to handle without requiring much felt or stuffing. Because the pattern is drafted from simple shapes, you can adjust the proportions before cutting fabric.
Materials and tools
- Green, cream, brown, purple, or another face colour of felt
- Black felt for the dress and hat
- A small accent colour for the hat band or boots
- Matching all-purpose thread and contrasting embroidery floss
- Polyester stuffing
- Paper, pencil, ruler, and a removable fabric marker
- Sharp fabric scissors and small detail scissors
- Hand-sewing needle, pins or fabric clips
- Sewing machine with a standard foot, if machine sewing
You can compare wool-blend felt sheets for sewing on Amazon. Choose colour and fibre content for the project rather than buying the largest pack. If you need filling, polyester doll stuffing is easier to add in small pinches than dense pre-shaped filling.
1. Draft the simple witch pattern
Draw the body as a rounded rectangle or a gentle A-line shape. Add a half-inch tab at the top if you want the head to overlap the body, or make the head and body as one continuous shape. Draw a separate round or slightly oval head, two narrow arms, and two simple boot shapes.
For the hat, draw a wide triangle with a slightly curved tip. Add a separate brim that extends beyond both sides of the head. Fold the paper shapes along the centre to check symmetry, then place them together before cutting felt. The face should remain visible below the brim and the arms should reach the sides of the dress without looking too thin to turn or stuff.
2. Cut and label the felt pieces
Cut two body pieces, two head pieces, four arm pieces, and four boot pieces if each small part will be lightly stuffed. Cut two hat triangles and one or two brim pieces depending on whether you want the brim backed.
Trace on the wrong side of the felt with a light removable mark. Use long, smooth scissor strokes on large curves and small scissors only for tight corners. Pair the matching pieces immediately so slightly different shapes do not become mixed.
If felt behaviour is unfamiliar, the fabric sewing guide explains why a test piece is useful before choosing machine stitch length and pressure.
3. Add the face before assembly
Position the eyes, nose, and mouth on one head piece. Mark lightly and check that the hat brim will not cover the eyes. Embroider small eyes with satin stitches or French knots, add a simple backstitched smile, and make the nose from a few straight stitches.
For hair, place short lengths of yarn or narrow felt strips along the head edge where the side and top seam will catch them. Keep the ends away from the seam allowance. Avoid long loose loops if the doll may be handled.
It is much easier to embroider a flat face than a stuffed one. Knots and thread tails should remain on the wrong side and be secured without creating a hard lump.
4. Sew the arms and boots
Place each pair together. For turned parts, sew around the sides with a short stitch and leave the top open. Trim bulky corners, turn carefully with a blunt tool, and add only enough stuffing to create shape. For exposed seams, blanket-stitch or whipstitch around the edges and leave the attachment end open.
If the arms are too narrow to turn without stretching, do not force them. Use a single layer of thicker felt or switch to an exposed edge stitch. A clean, flat arm is better than a distorted stuffed tube.
5. Assemble and stuff the body
Place the arms and boots between the body layers with their raw attachment ends extending into the seam allowance. Confirm that the visible parts point inward if the body will be turned. Pin or clip securely, leaving a gap along one side or the bottom for turning and stuffing.
Sew slowly around the body. Pivot with the needle down at corners and keep the narrow attachments clear of the needle. Clip inward curves sparingly and trim corners without cutting the stitches. Turn the body, shape the edges, and add stuffing in small amounts.
Keep the doll soft enough that the seams lie flat. Close the opening with ladder stitch by hand. The straight-line sewing guide can help if maintaining a small seam allowance is new to you.
6. Sew and attach the head
Sew the head pieces together, leaving the lower edge open. Turn and lightly stuff it, keeping the face smooth. Place the lower head over the body tab or align it with the neckline, then secure it with small hand stitches around the join.
Check the face direction before stitching all the way around. If the head tilts, remove only the attachment stitches and reposition it rather than pulling the thread tighter on one side.
7. Make the pointed hat
Sew the two hat triangles together along the angled sides, leaving the bottom open. Turn the point gradually with a blunt tool. A slightly bent tip gives the witch character and avoids the need to force a perfectly sharp corner.
Attach the brim to the lower edge or sandwich the hat opening between two brim layers. Add a felt band before placing the hat on the head. Secure the finished hat with a few hidden stitches behind the brim so it does not rotate.
8. Finish without overcrowding the doll
Add one or two details such as a tiny felt patch, stitched buckle, fabric broom, or hanging loop. Keep the face readable and the silhouette clear. Too many glued embellishments make a small project look busy and can hide unevenly.
Trim loose threads and inspect every seam. If the doll rocks or leans, flatten the base gently or adjust the stuffing near the lower body. Store it dry and flat enough that the hat point is not crushed.
Frequently Asked Questions
Felt witch doll questions
What felt is best for a small witch doll?
Wool-blend felt is durable and usually cuts cleanly, while good-quality craft felt is affordable for a decorative doll. Avoid very thin felt that stretches around stuffing or shows glue and stitches easily.
Can a beginner sew the witch doll by hand?
Yes. A small running stitch, backstitch, and whipstitch are enough. Hand sewing also gives better control around the hat point and narrow arms.
Can children make this felt witch?
Older children can help with tracing, arranging, and hand stitching under supervision. An adult should handle sharp scissors, small pieces, hot glue if used, and sewing-machine work according to the child’s ability.
How much stuffing should I add?
Use small pinches and stop while the doll still feels softly shaped. Overstuffing spreads the seam, distorts the face, and makes it difficult to close the opening neatly.
Is this felt witch suitable as a toy?
The project is designed primarily as seasonal decor. Buttons, beads, glued pieces, and loose fibres can create hazards for young children, so omit detachable embellishments and use appropriate construction if making any child-handled item.
Make the first version easy to finish
A successful felt witch does not need tiny fingers, a complicated face, or elaborate clothing. Clean cutting, secure seams, light stuffing, and a recognisable hat create the character. Save extra details for a second version after you know which scale is comfortable to sew.