

Affiliate disclosure: We may earn from qualifying Amazon purchases at no extra cost to you. Products are selected for utility and reader fit, not ratings or commission.
The best embroidery machine for a beginner is not necessarily the one with the most built-in designs. A first machine needs to fit the projects you actually want to make, provide a manageable design-transfer workflow and leave enough room to grow without forcing you to pay for capacity you may never use.
Hoop size is one of the biggest decisions. A 4-by-4-inch field can handle names, patches, small motifs and many baby items, but it becomes restrictive for larger shirt designs, jacket backs and layouts that cannot be split cleanly. A 5-by-7-inch field gives a beginner noticeably more freedom. Larger dedicated platforms offer more growth, but they also increase price, footprint and learning demands.
You also need to decide between embroidery-only and combination sewing-and-embroidery machines. An embroidery-only model keeps the learning process focused and can continue stitching while another machine handles construction. A combo machine saves space and gives a new sewist both functions, but switching modes takes time and the embroidery side may be limited.
This guide compares six machines that serve genuinely different beginners. The recommendations are based on field size, hoop ecosystem, transfer method, editing, trimming, placement, training, support and true ownership cost, not decorative-design count alone.
Quick recommendations
Quick comparison
Showing three products at a time. Scroll vertically to see the remaining models.
| Product image | Title and best fit | Type | Current price |
|---|---|---|---|
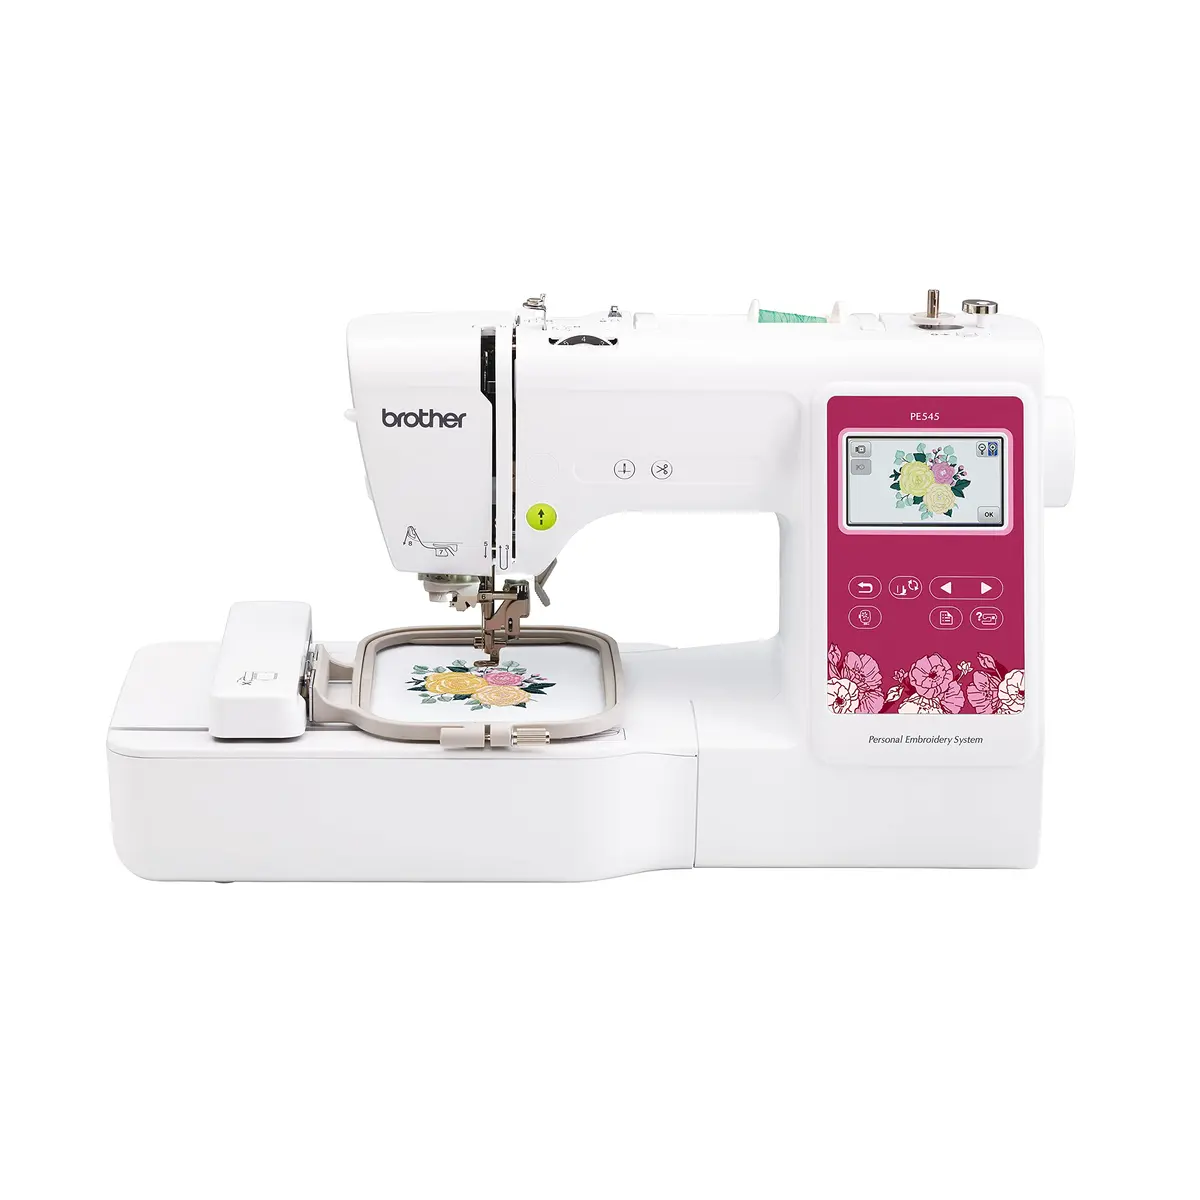 | Brother PE545 Budget-conscious conventional learning | Embroidery-only, 4 x 4 | Check price |
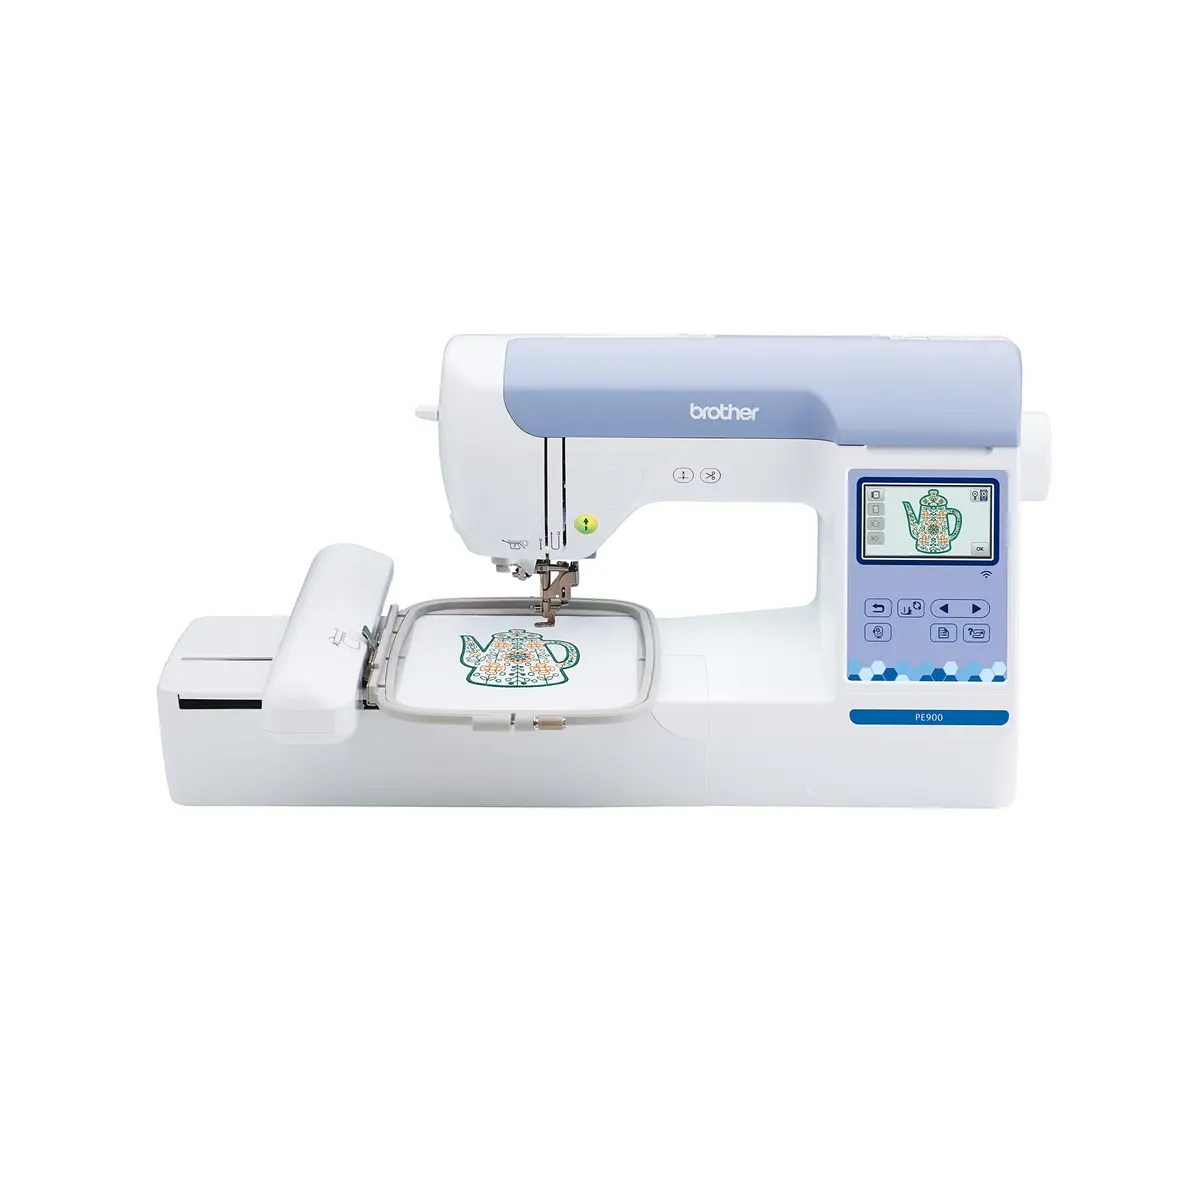 | Brother PE900 Room to grow | Embroidery-only, 5 x 7 | Check price |
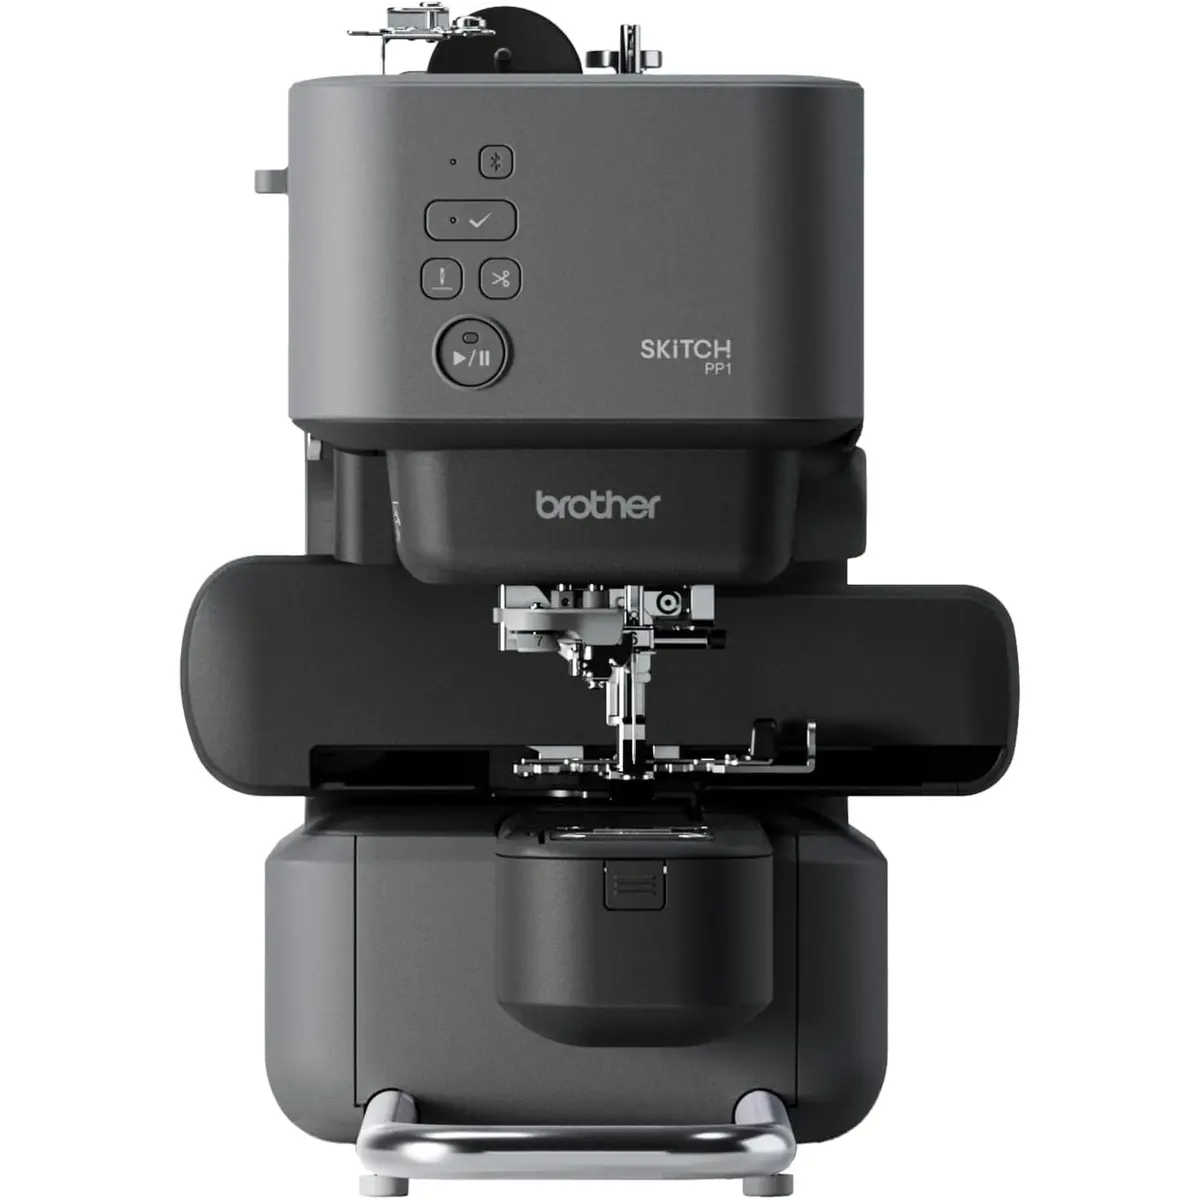 | Brother Skitch PP1 Small finished items | App-led embroidery-only, 4 x 4 | Check price |
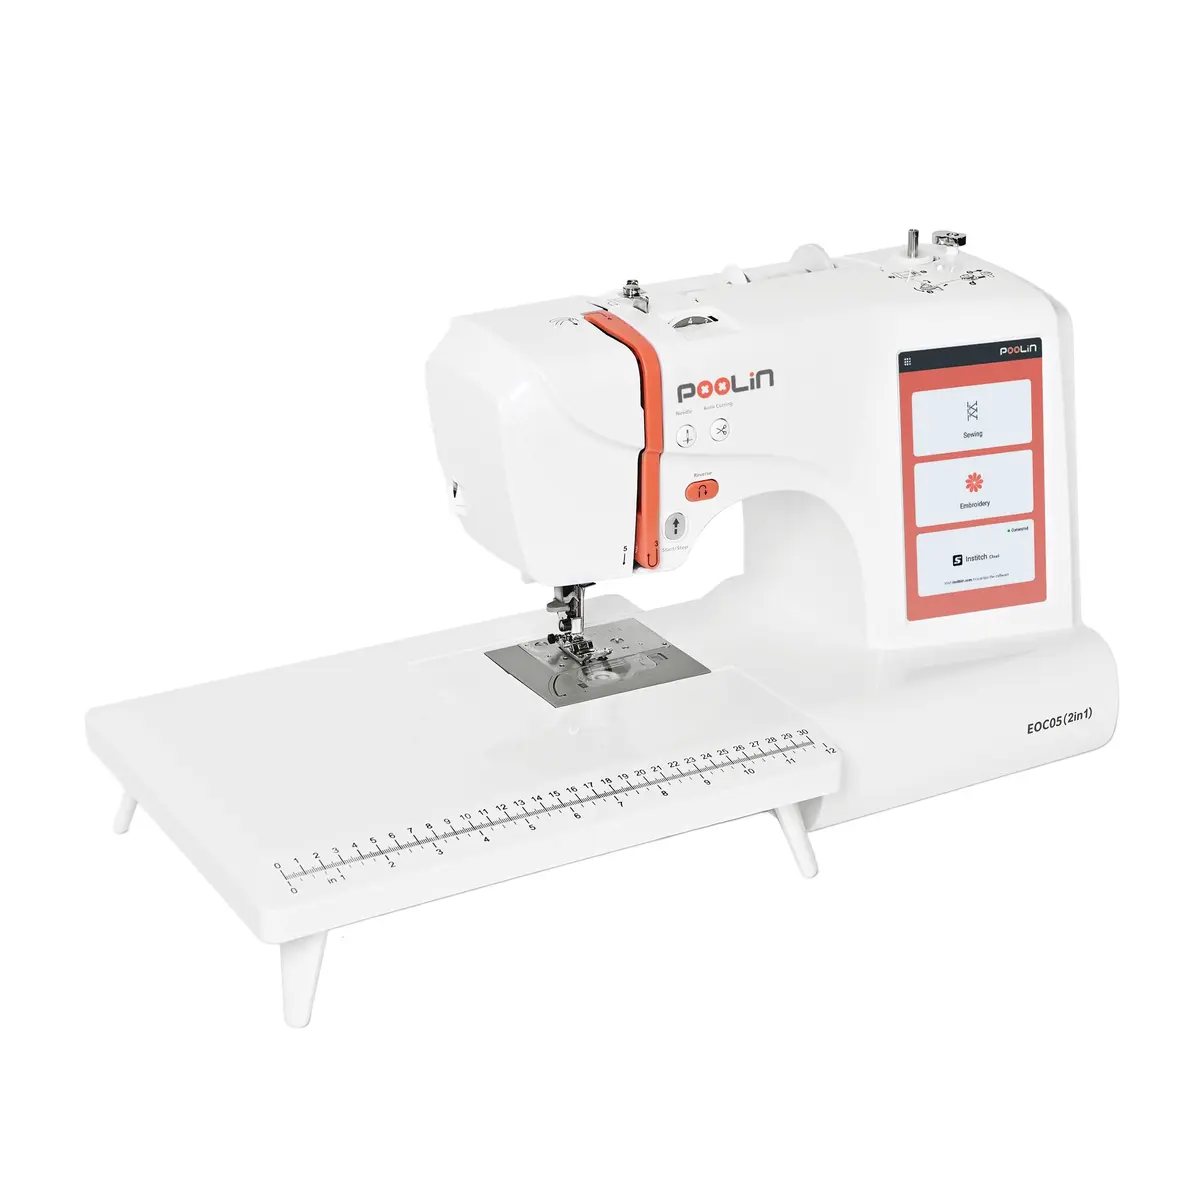 | PooLin EOC05 Larger screen at a lower entry price | Embroidery-only, 4 x 4 plus repositionable 4 x 9.25 | Check price |
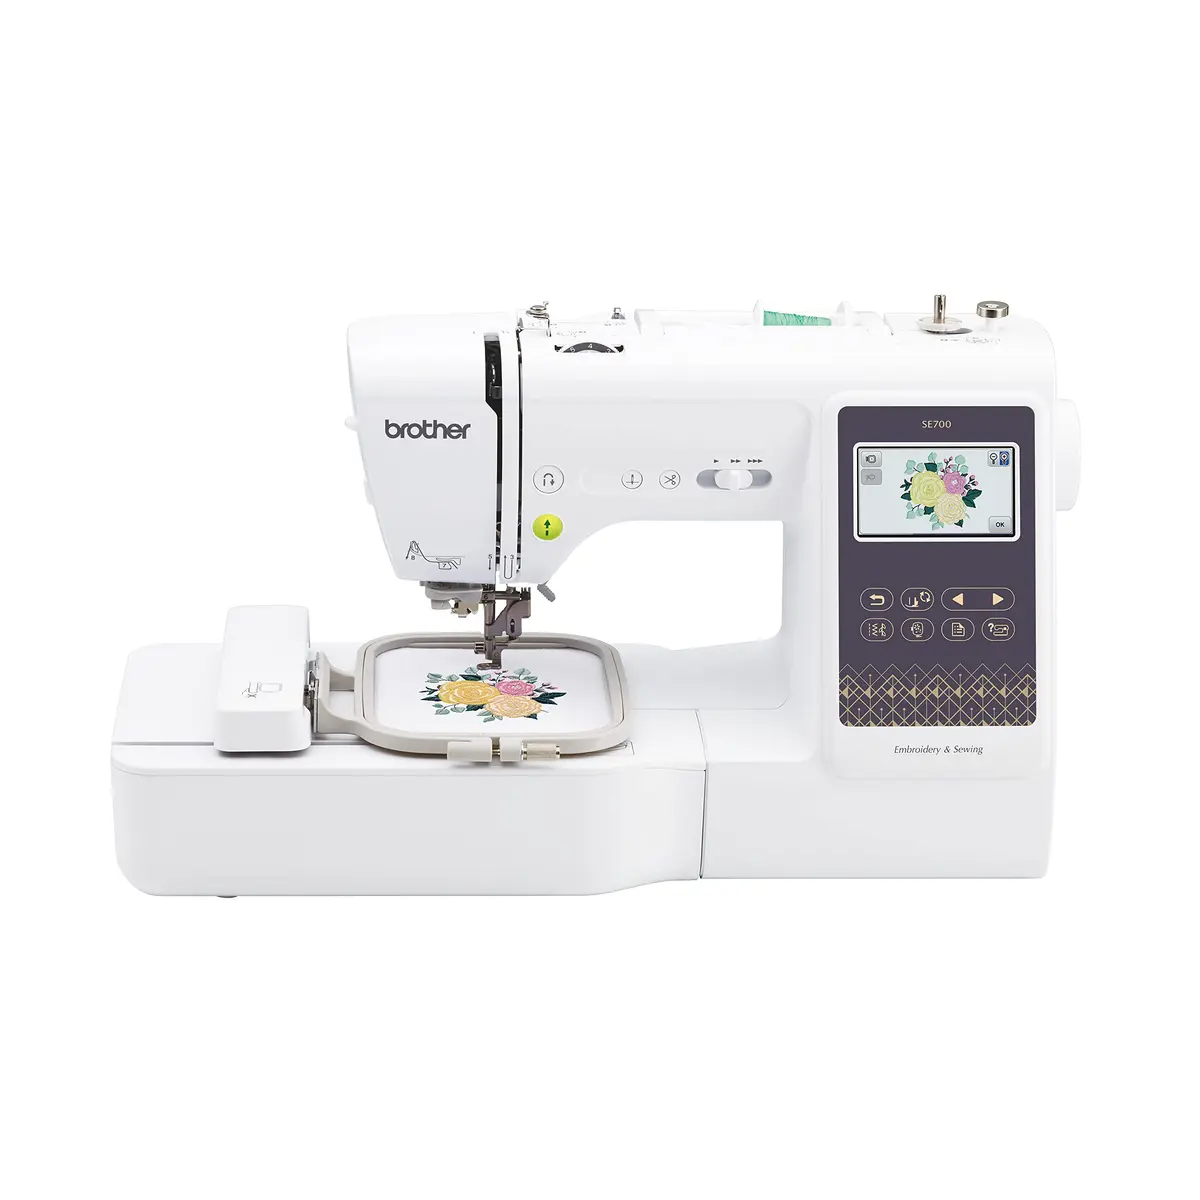 | Brother SE700 Sewing plus occasional embroidery | Combination, 4 x 4 | Check price |
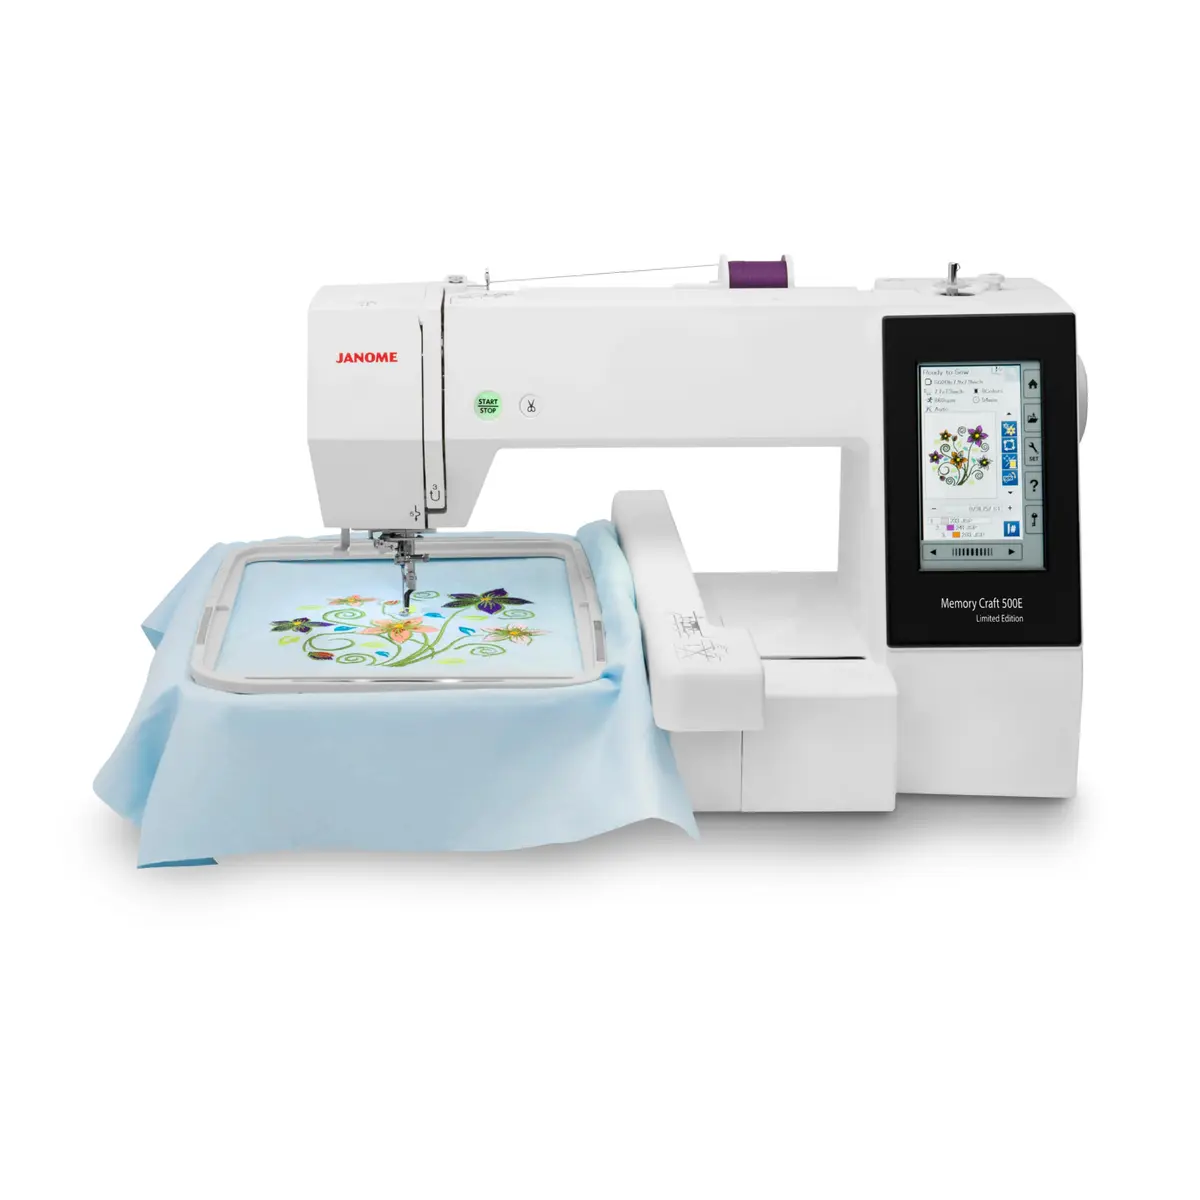 | Janome Memory Craft 500E LE Serious long-term embroidery | Large-field embroidery-only | Check price |
Detailed recommendations
Brother PE545 Wireless Embroidery Machine
Recommended for its specific use case
Best for: Budget-conscious beginners who want conventional on-machine controls
The PE545 is a focused introduction to machine embroidery. It is embroidery-only, so a beginner can learn hooping, stabilising, threading, design placement and colour changes without also navigating a sewing mode. Its colour touchscreen previews designs and supports basic on-machine editing, while built-in tutorials help with common setup steps.
Designs can be transferred by USB or wirelessly. Having both options matters because it prevents the machine from depending entirely on one app or network workflow. A beginner can start with built-in designs, move to purchased files and gradually learn how file formats, sizing and stitch density affect results.
The 4-by-4-inch field is approachable for monograms, patches, small motifs, children's items, labels and many gift projects. It keeps stabiliser and test-stitch costs relatively controlled while the user develops technique.
That same field is the PE545's central limitation. A design described as suitable for a shirt may still exceed 4 by 4 inches, and resizing embroidery files substantially is not the same as resizing an image. Large reductions or enlargements can damage stitch density unless the file is properly recalculated in suitable software.
Choose the PE545 if your expected projects genuinely fit a 4-by-4 field and you want a conventional machine with established learning resources. If you already expect to embroider larger chest designs, bags or jacket panels, the PE900 may prevent an early upgrade.
Brother PE900 Wireless Embroidery Machine
Recommended for its specific use case
Best for: Beginners who expect to outgrow a 4-by-4 hoop quickly
The PE900 is the strongest general recommendation here for a beginner already committed to embroidery. Its 5-by-7-inch field provides meaningfully more usable area than a 4-by-4 machine without moving into a very large professional-style platform. The extra room accommodates more lettering, larger motifs and designs that would otherwise require splitting or repositioning.
Wireless design transfer supports a modern workflow, while USB remains useful when a direct file method is preferable. Automatic jump-stitch trimming can reduce manual cleanup between separate design sections, particularly in multi-element layouts.
It remains a single-needle home machine. You still change thread colours manually, learn stabiliser selection and monitor the embroidery process. Automatic features do not correct poor hooping, unsuitable thread, an incorrect needle or a design that is too dense for the fabric.
The PE900 costs more than an entry 4-by-4 machine and does not sew normal seams. Digitising software is also separate. Beginners should distinguish between importing an existing compatible design and creating a stitch file from artwork. True digitising is a skilled process, not an automatic conversion included with the machine.
Choose the PE900 when 5 by 7 inches covers the projects you want and the machine will be used often enough to justify a dedicated embroidery setup. It offers a better growth path than the PE545 without demanding the price and space of the Janome 500E LE.
Brother Skitch PP1 Single-Needle Embroidery Machine
Recommended for its specific use case
Best for: Phone-first users embroidering small personalised finished items
The Skitch PP1 is not simply another 4-by-4 flatbed machine. Its compact free-arm design and magnetic hoop make it relevant for small tubular or finished items that can be awkward to position on a conventional embroidery bed. Sleeves, socks, small bags and certain ready-made garments are the kinds of projects that give its format a purpose.
The workflow is centred on Brother's Artspira app. For a user comfortable preparing and sending projects from a phone, this can feel simpler than managing files through a computer and navigating a large machine screen. The magnetic hoop can also reduce some of the friction involved in hooping small items.
App dependence is the main tradeoff. Buyers should understand which tools are included without payment, which functions may require a subscription and what happens if their phone, network or app access changes. A machine that feels simple because of an app can become restrictive if the desired workflow falls outside that ecosystem.
The 4-by-4 field and modest speed also limit production and larger designs. The Skitch is best for a beginner whose project list matches its free-arm advantage, not someone choosing solely because the machine looks compact or modern.
PooLin EOC05 Embroidery Machine
Recommended for its specific use case
Best for: Beginners prioritising a large screen and longer layouts at a lower entry price
The EOC05 offers a seven-inch touchscreen, Wi-Fi transfer and both a standard 4-by-4 hoop and a repositionable 4-by-9.25 option. That combination gives a beginner more visual working space and layout flexibility than a basic small-screen 4-by-4 model.
The long hoop needs to be understood correctly. A repositionable hoop does not create a true 4-by-9.25 continuous field in the same way a machine with a physically larger sewing area does. Longer designs are typically divided into sections and stitched after repositioning. Alignment and file preparation therefore matter.
For lettering arrangements, borders and designs prepared for multi-position stitching, this can still be useful. The large screen may also make design positioning and editing easier to see than on compact displays.
The limitation is ecosystem maturity. Dealer availability, resale value, long-term parts access and the amount of independent training are less established than with Brother or Janome. Beginners who need in-person lessons or easy local servicing should verify support before buying. Lower purchase cost is less valuable if help, hoops or replacement components are difficult to obtain.
Brother SE700 Sewing and Embroidery Machine
Recommended for its specific use case
Best for: Beginners who need one machine for garment sewing and small embroidery
The SE700 combines 103 sewing stitches with a 4-by-4 embroidery system, wireless transfer and a colour touchscreen. It is the logical option for a beginner who does not already own a sewing machine and wants to construct garments or crafts as well as add names and small motifs.
A combo machine saves space and can cost less than buying two separate machines. The sewing side covers general construction, while the embroidery unit creates a path into personalisation. Controls and design transfer will also feel familiar to users considering Brother's entry embroidery-only models.
The compromise is workflow. Switching between sewing and embroidery requires changing the setup, and the machine cannot sew seams while an embroidery design is running. A dedicated embroidery machine becomes more efficient when embroidery is frequent or when the user wants to keep a separate sewing project ready.
Its 4-by-4 field also limits growth. The SE700 should be chosen because the buyer needs both modes and expects modest embroidery, not because it is assumed to replace a larger dedicated embroidery machine.
Janome Memory Craft 500E LE Embroidery Machine
Recommended for its specific use case
Best for: Committed beginners wanting a large field and long-term embroidery growth
The Janome 500E LE is the deliberate high-end beginner option. It is not intended for someone casually testing whether embroidery might be enjoyable. It suits a buyer who already has clear project ambitions and wants to avoid moving from a small entry machine to a large platform soon afterward.
Its dedicated embroidery format, large working area, multiple hoops and extensive on-screen editing make it suitable for larger motifs, garment panels, home-decor embroidery and more complex layouts. A broader hoop ecosystem also gives the user more project flexibility than a single small field.
The advantages bring real costs. The machine occupies more space, has a steeper learning curve and requires a larger initial budget. Stabiliser, thread, needles, bobbins, design files and possibly digitising software add to the total. It does not sew ordinary seams, so garment makers still need a sewing machine.
Dealer support deserves attention at this level. Setup instruction, warranty handling, maintenance and help choosing compatible hoops can materially improve ownership. The 500E LE is best for the committed beginner who wants serious home embroidery and can support both the financial and learning investment.
Best Embroidery Machine for Beginners: Six Sensible First Machines
The best embroidery machine for a beginner is not necessarily the one with the most built-in designs. A first machine needs to fit the projects you actually want to make, provide a manageable design-transfer workflow and leave enough room to grow without forcing you to pay for capacity you may never use.
Hoop size is one of the biggest decisions. A 4-by-4-inch field can handle names, patches, small motifs and many baby items, but it becomes restrictive for larger shirt designs, jacket backs and layouts that cannot be split cleanly. A 5-by-7-inch field gives a beginner noticeably more freedom. Larger dedicated platforms offer more growth, but they also increase price, footprint and learning demands.
You also need to decide between embroidery-only and combination sewing-and-embroidery machines. An embroidery-only model keeps the learning process focused and can continue stitching while another machine handles construction. A combo machine saves space and gives a new sewist both functions, but switching modes takes time and the embroidery side may be limited.
This guide compares six machines that serve genuinely different beginners. The recommendations are based on field size, hoop ecosystem, transfer method, editing, trimming, placement, training, support and true ownership cost, not decorative-design count alone.
Embroidery-only or sewing-and-embroidery combo?
Choose embroidery-only if you already own a satisfactory sewing machine, expect to embroider frequently or want one project embroidering while another machine remains ready for construction. Dedicated machines also avoid repeated mode conversion and usually make the intended embroidery capacity clearer.
Choose a combo such as the SE700 if space is limited, you are starting both sewing and embroidery, and 4-by-4 designs cover your expected projects. A combo is convenient, but it ties both functions to one machine and may be outgrown sooner on the embroidery side.
Neither format is automatically better for a beginner. The right answer depends on your existing equipment, space and how often you expect to embroider.
Why hoop size matters more than built-in design count
Built-in designs are easy to advertise, but many users soon purchase or create files that better match their style. The embroidery field determines whether those designs can be stitched at all.
A 4-by-4 field works well for:
- Names and initials
- Small patches and motifs
- Baby items and labels
- Small pockets and accessories
- Learning stabiliser and placement basics
A 5-by-7 field provides more room for:
- Larger shirt and bag designs
- Multi-line text
- More detailed motifs
- Designs that would otherwise need splitting
- A broader range of purchased files
A repositionable long hoop can extend layout length, but it is not equivalent to a wider native field. Large-field machines provide more freedom but require more table space, stabiliser and budget.
The beginner embroidery workflow
1. Choose a suitable design
Confirm that the file format and dimensions are compatible with the machine. Do not assume any image can be sent directly for stitching. Embroidery machines need stitch data that controls path, density, underlay and colour changes.
2. Match the stabiliser to the fabric and design
Stabiliser supports the fabric against the movement and stitch load of embroidery. Cut-away, tear-away, wash-away and specialty stabilisers serve different materials and outcomes. A poor match can cause puckering, distortion or weak stitching even when the machine works correctly.
3. Hoop or float accurately
The fabric and stabiliser need appropriate tension without being stretched out of shape. Some projects are hooped together; others are floated over a hooped stabiliser. Magnetic hoops can simplify certain items but do not remove the need for alignment and support.
4. Test the complete design
Use the same fabric, stabiliser, thread and needle planned for the final project. A design that stitches well on stable cotton may behave differently on knit, fleece, towel or a finished garment.
5. Confirm placement and clearance
Trace the design area using the machine's placement tools where available. Check that seams, pockets, zippers and the body of a tubular item will not obstruct movement.
6. Monitor the stitch-out
Single-needle machines require manual colour changes. Watch for thread breaks, loops, shifting fabric and clearance issues. Machine embroidery is automated stitching, not an unattended process.
True cost of a first embroidery machine
The machine price is only the beginning. A realistic starter budget may also include:
- Embroidery thread in usable colours
- Pre-wound or compatible bobbin thread
- Embroidery needles
- Cut-away, tear-away and wash-away stabilisers
- Temporary adhesive or placement tools where appropriate
- Additional hoop sizes
- Test fabric and blanks
- Purchased design files
- Editing or digitising software
- Training, servicing and replacement parts
Do not buy every accessory immediately. Start with supplies for two or three defined projects, learn what the machine and materials require, then expand. This reduces waste and reveals whether the included hoop ecosystem suits your plans.
Design transfer and software
USB transfer is direct and does not depend on an app subscription or wireless connection. Wireless transfer can be faster for everyday use and reduces movement of drives between devices. App-led machines may simplify selection for phone users but can restrict the workflow to the features and policies of that ecosystem.
Editing and digitising are also different. Basic editing changes size within safe limits, rotates, mirrors, combines or repositions existing embroidery data. Digitising creates stitch data from artwork and requires decisions about paths, underlay, density, pull compensation and fabric behaviour.
A beginner does not need professional digitising software on day one. Learning to hoop, stabilise and stitch well-designed existing files is a more useful starting point.
Common beginner mistakes
Buying a 4-by-4 machine without checking desired designs
Measure the actual designs you want to make. Product photos can make a motif look smaller than its stitch dimensions.
Choosing by built-in design count
Field size, transfer workflow, editing, trimming, support and hoops have a greater long-term effect.
Assuming embroidery files resize like normal graphics
Significant resizing changes stitch density and may require proper recalculation or redigitising.
Under-budgeting for stabiliser and testing
Successful embroidery depends on consumables and test stitch-outs. These are not optional extras.
Buying a combo when embroidery will be the main activity
A combo can be excellent for occasional use, but frequent embroiderers may prefer a dedicated machine and separate sewing setup.
Ignoring training and service
Strong tutorials, active user communities, dealer support and parts access can matter more than an extra bundle of designs.
Final verdict
The Brother PE545 is the most approachable conventional choice for a budget-conscious beginner whose projects fit a 4-by-4 field. The Brother PE900 is the better long-term starting point for someone who expects to use embroidery regularly and wants the practical freedom of 5 by 7 inches.
Choose the Brother Skitch PP1 when small finished and tubular items are the central goal and an app-led workflow is genuinely appealing. Consider the PooLin EOC05 when a large screen and repositionable long-hoop capability matter, but verify training, service and parts access first.
The Brother SE700 is appropriate for a beginner who needs sewing and small embroidery in one machine. The Janome Memory Craft 500E LE is for the committed beginner prepared to invest in a large dedicated platform and the supplies, space and learning that accompany it.
For most buyers, the decision begins with three questions: Do I need normal sewing as well as embroidery? Will a 4-by-4 field fit my actual projects? Do I want a conventional machine workflow, an app-led system or a larger long-term platform? Once those answers are clear, design count becomes a secondary detail.
Frequently asked questions
What hoop size is best for a beginner embroidery machine?
A 4-by-4 field is sufficient for small names, patches and motifs. A 5-by-7 field gives more room to grow and fits a broader range of purchased designs. Choose by intended project dimensions, not beginner status alone.
Can an embroidery machine sew normal seams?
An embroidery-only machine cannot. A combination machine such as the Brother SE700 can perform normal sewing and embroidery after changing its setup.
Do I need digitising software as a beginner?
No. You can begin with built-in and purchased compatible embroidery files. Digitising is needed when you want to turn original artwork into well-planned stitch data.
Is the Brother PE545 too small?
It is not too small for projects designed within a 4-by-4 field. It becomes restrictive for larger shirt designs, jacket backs and layouts that cannot be divided cleanly.
Is the Brother PE900 worth paying more for than the PE545?
It can be if you expect regular embroidery. The 5-by-7 field and jump-stitch trimming offer meaningful workflow and project advantages rather than only adding decorative designs.
Is a magnetic hoop easier for beginners?
It can simplify positioning certain fabrics and finished items, but the project still needs suitable stabiliser, accurate placement and enough holding strength to prevent movement.
Can I embroider hats on these machines?
These are flat or free-arm single-needle home machines, not commercial cap machines. Some flat hat sections may be embroidered with compatible methods, but structured finished caps are a specialised task and should not be the main reason to choose these models.
How much should I budget beyond the machine?
Budget for thread, bobbins, needles, multiple stabiliser types, test materials and project blanks. Additional hoops, designs, software and servicing may follow after you understand your workflow.