
← Sewing glossary

Thread path

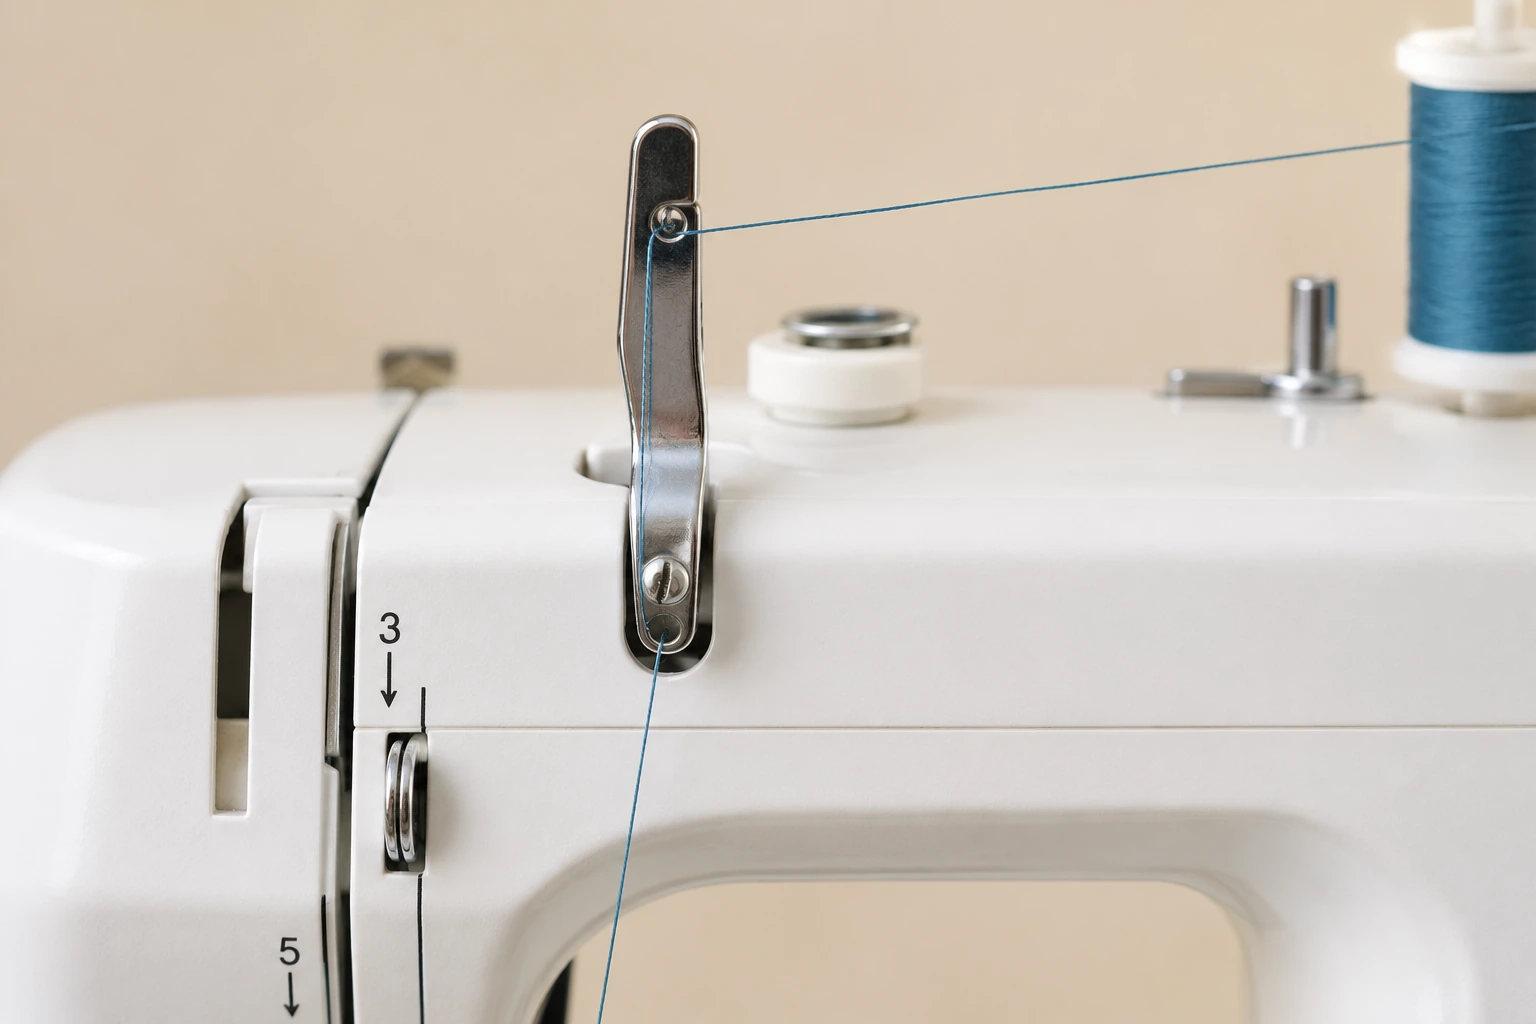
Thread Take-Up Lever

The moving lever that pays out upper thread for loop formation, then removes slack to tighten every stitch.

Close-up of a chrome sewing machine thread take-up lever with blue thread passing through its eye
Upper thread passing through the sewing machine take-up lever. The take-up lever rises and falls during each stitch cycle, releasing upper thread as the needle descends and drawing it tight as the needle rises. Correct threading through its eye is essential for balanced stitch formation.
01

Its role in the stitch cycle

As the needle descends, the lever lowers and releases thread. As the needle rises, it pulls upward and seats the completed stitch.

02

Why it can be missed

On many machines the lever moves behind a front cover. Turn the handwheel toward you until it reaches the highest point before threading.

03

Symptoms of a missed lever

Upper thread may whip, bunch underneath, or break near the needle. The machine still moves, so the error is often mistaken for a bobbin fault.

Useful distinction

Rethread from the spool

After a jam, remove the upper thread completely and begin again. Replacing only the visible loose section can leave another guide or tension disc missed.

Practical guide

Keep the take-up lever connected through the full stitch cycle

The lever releases thread as the needle descends and removes slack as the stitch closes. Missing it during threading leaves uncontrolled upper thread that commonly collects beneath the fabric.

Thread with the lever fully raised

Raise the presser foot to open the tension discs and turn the handwheel toward you until the take-up lever reaches its highest point. Follow the marked path and verify that thread enters the actual eye or slot rather than passing beside a covered lever.

Recognise a missed lever

The machine may make a few loose stitches before thread whips, breaks, or forms a nest beneath the plate. Stop, cut the work free, remove trapped thread, and rethread completely from the spool. Replacing only the loose section near the needle does not restore the missed guide.

Hold starting tails correctly

After threading, pull both upper and bobbin tails beneath the foot and toward the back. Hold them lightly for the first few stitches, especially near a raw edge. This prevents short tails being drawn into the hook before the lever can control the first stitch.

Investigate unusual motion or noise

The lever should move once through every stitch cycle. A new click, scrape, or failure to travel may indicate trapped thread, a loose cover, or an internal linkage problem. Do not add oil through the visible slot unless the manual specifically instructs it.

Avoidable mistakes

Threading shortcuts that bypass the lever

  • Threading while the needle is low can hide the lever opening.
  • Keeping the presser foot down prevents thread seating properly in the tension discs.
  • Pulling thread directly from the needle after a jam may tighten a hidden tangle.
  • Sewing with a very short starting tail can pull thread out of the lever or needle.

Common questions

Thread Take-Up Lever FAQs

Why does thread slip out of the take-up lever?

It may be routed from the wrong direction, the lever may be too low, or the starting tail may be too short. Follow the diagram and hold the tails initially.

Can I thread the lever with the needle down?

Some exposed designs allow it, but raising the lever fully is more reliable and makes the guide easier to see.

What does a new clicking sound near the lever mean?

It can indicate trapped thread, a loose cover, or interference in the upper path. Stop and inspect rather than adding oil.

Does every lockstitch machine have a visible lever?

Most use an equivalent mechanism, but enclosed or computerized designs may hide it behind the faceplate.