
← Sewing glossary

Machine anatomy

Needle Clamp

The holder at the bottom of the needle bar that grips the needle shank in its exact sewing position.

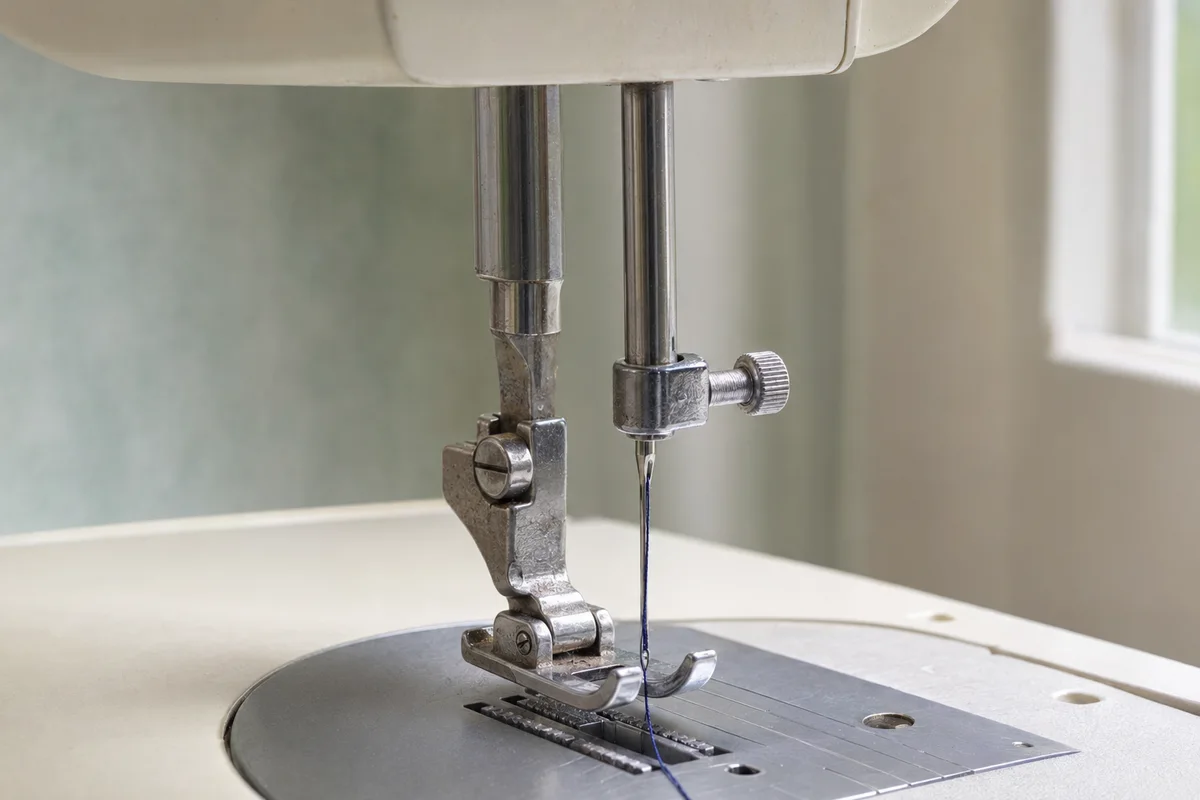
A silver needle clamp and knurled screw holding a threaded needle beside the separate presser-foot bar of a domestic sewing machine
A domestic sewing machine needle clamp and screw. The clamp grips the needle shank at the lower end of the needle bar, while the small side screw secures it at the correct height. The separate presser bar and foot remain visible beside the needle assembly.
01

Seat the needle fully

Raise the needle bar, loosen the clamp only enough to remove the needle, then push the replacement upward until it meets the stop. Orient the flat side or groove exactly as the manual specifies.

02

Tighten with the proper tool

Finger-tight is often insufficient. Hold the needle in position and use the supplied screwdriver to tighten firmly without applying excessive force that can strip the screw or distort the clamp.

03

Recognize a clamp problem

A needle that slips downward, rotates, repeatedly loosens, or cannot be inserted fully may indicate debris, a damaged screw, worn threads, or a bent clamp requiring model-specific service.

Useful distinction

Needle height is part of stitch timing

Even a slightly lowered needle changes where its scarf and loop meet the hook. Correct seating must be confirmed before diagnosing hook timing.

Practical guide

Preserve the exact height and orientation set by the clamp

The clamp is small but mechanically critical. It positions the needle relative to the hook, plate, and presser foot, so partial insertion, incorrect orientation, or damaged threads can create faults far beyond a loose needle.

Remove the old needle safely

Unplug the machine, raise the needle bar fully, lower the presser foot if it helps access, and hold the needle before loosening the screw. A small scrap over the plate opening can prevent the needle from dropping into the hook area.

Seat the replacement against its stop

Orient the flat side or groove exactly as the manual shows and push the shank upward until it cannot travel farther. Keep it there while tightening with the supplied tool. Finger-tight alone may allow the needle to slip during dense stitching.

Check clearance after any change

Fit the intended presser foot and stitch setting, then turn the handwheel slowly through a complete cycle. Confirm that the needle clears the foot and plate at every selected position. This is especially important with twin needles, narrow feet, and straight-stitch plates.

Identify clamp damage

A screw that spins without tightening, a needle that repeatedly slips, a cracked holder, or a clamp visibly out of line needs the correct replacement or service. Do not substitute an oversized screw or add packing around the needle shank.

Avoidable mistakes

Small clamp errors with expensive consequences

  • Tightening before the needle reaches the upper stop leaves it at the wrong height.
  • Using pliers can overtighten or deform the screw head.
  • A reversed needle may thread normally but fail to form stitches.
  • Testing a wide stitch under power can turn a clearance error into a broken needle.

Common questions

Needle Clamp FAQs

Why does the needle fall out while sewing?

It may not have been inserted fully, the screw may be loose, or the clamp threads may be damaged. Stop immediately and inspect for a needle strike.

Can the clamp screw be tightened with pliers?

No. Use the supplied screwdriver or specified tool; pliers can damage the head and encourage overtightening.

Why will a new needle not slide fully into the clamp?

The needle system or orientation may be wrong, the screw may not be loosened enough, or a broken shank or debris may be lodged inside.

Should the clamp be oiled?

Not unless the model manual explicitly calls for lubrication there. Oil can migrate to the needle and stain fabric.