
← Sewing glossary

Garment finishing stitch

Coverstitch

A stretchy finish with one or more parallel needle lines on the top and looper thread covering the underside.

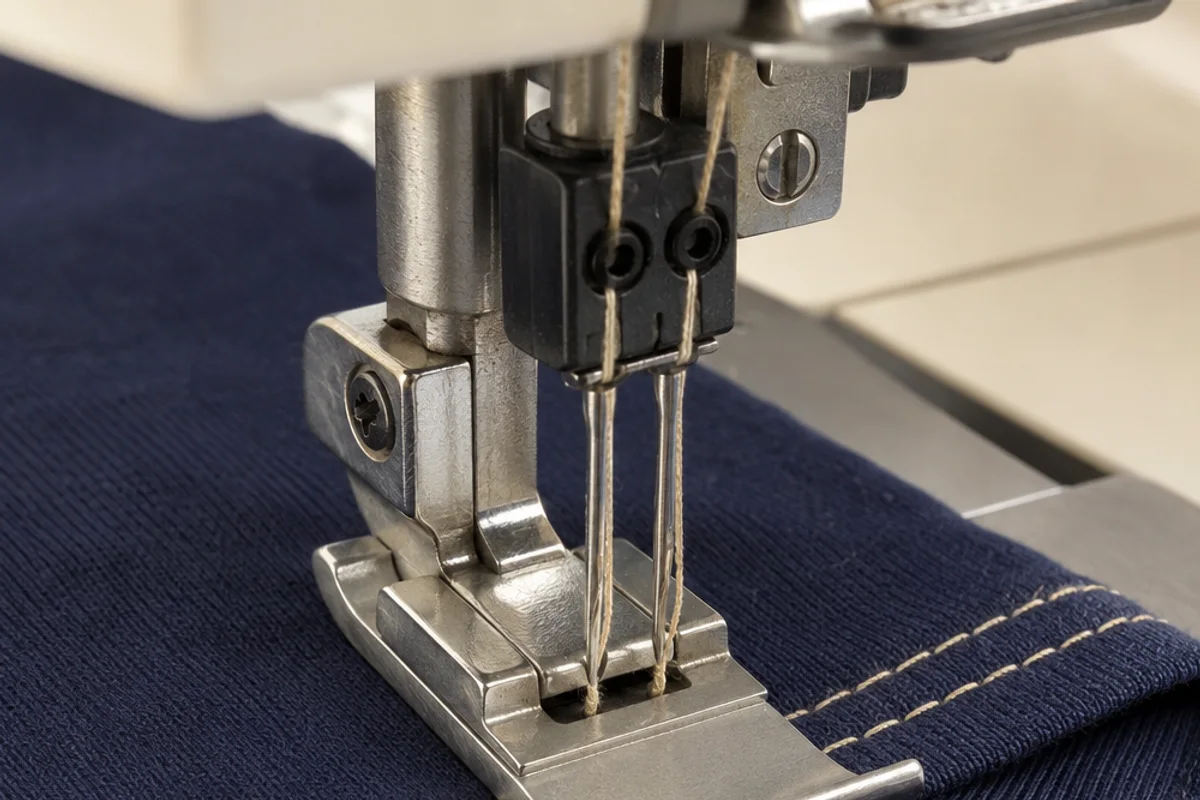
Two needles and a broad coverstitch presser foot forming parallel cream stitch rows on a folded navy knit hem
A two-needle coverstitch forming parallel top rows. Two needle threads create the straight lines visible on the garment face, while a looper thread links them beneath the folded hem. The cropped view focuses on the accurate top-side formation.
01

How the stitch is formed

One, two, or three needles create visible parallel lines while a lower looper interlaces thread across the reverse. The structure stretches without using a bobbin.

02

Where it is used

T-shirt hems, activewear, neckbands, elastic application, binding, and decorative reverse coverstitching are common uses. The stitch can be sewn away from a raw edge.

03

Coverstitch versus overlock

A coverstitch machine normally does not trim the edge while hemming. An overlocker or serger wraps and usually trims a raw edge; combination machines can provide both systems after reconfiguration.

Useful distinction

Parallel lines alone do not prove a coverstitch

A twin needle on a lockstitch machine can create a similar top appearance, but the zigzagging bobbin thread underneath is structurally different from a coverstitch looper formation.

Practical guide

Build a balanced knit hem and finish its thread chain securely

Coverstitch quality depends on needle type, looper threading, differential feed, foot pressure, hem preparation, and how the seam begins and ends. The familiar parallel top lines are only the visible half of the structure.

Prepare the hem before stitching

Press or baste an even fold and mark the raw edge location from the right side. Support the garment so it does not drag. Guide the fold so the looper coverage catches the raw edge underneath without leaving excess fabric beyond the stitching.

Choose needle spacing intentionally

Two needles create a narrow or wide double row depending on their positions; three needles produce three parallel lines on supported machines. Use the specified coverstitch needle system and thread every active path in the documented order. Remove unused needles and their threads.

Tune for stretch and tunnelling

Test the actual knit and number of layers. Differential feed can counter stretching or gathering, while foot pressure and thread tensions affect flatness. Change one setting at a time and record the working combination instead of pulling the fabric to flatten it.

Finish without accidental unravelling

Coverstitch can release rapidly from the correct end. Follow the machine method for pulling needle threads to the underside, tying or weaving tails, or overlapping the seam. At a circular hem, sew over the starting stitches carefully and secure the released threads.

Avoidable mistakes

Why a professional-looking top can hide a weak hem

  • The raw edge may sit outside the looper coverage even when top rows look straight.
  • Standard lockstitch needles may not form reliable loops in a coverstitch machine.
  • Stretching fabric during sewing creates a wavy hem after release.
  • Cutting every tail flush can allow the chain to unravel.

Common questions

Coverstitch FAQs

Why does a coverstitch skip stitches over seams?

Needle choice, excessive height change, fabric lift, foot pressure, threading, or an unsuitable setup can prevent reliable loop formation.

Does a coverstitch machine cut fabric?

A dedicated coverstitch usually does not trim during hemming. Verify any combination machine’s selected configuration.

Can coverstitch be removed easily?

It can unravel quickly from the correct end once the thread structure is released, but pulling randomly may tighten or damage the fabric.

Is a coverstitch necessary for knit garments?

No. A sewing machine twin needle or stretch stitch can finish many knit hems, though a coverstitch offers a flexible ready-to-wear construction.