
← Sewing glossary

Presser foot

Buttonhole Foot

A foot designed to guide or measure the dense rectangular stitching used to create a buttonhole.

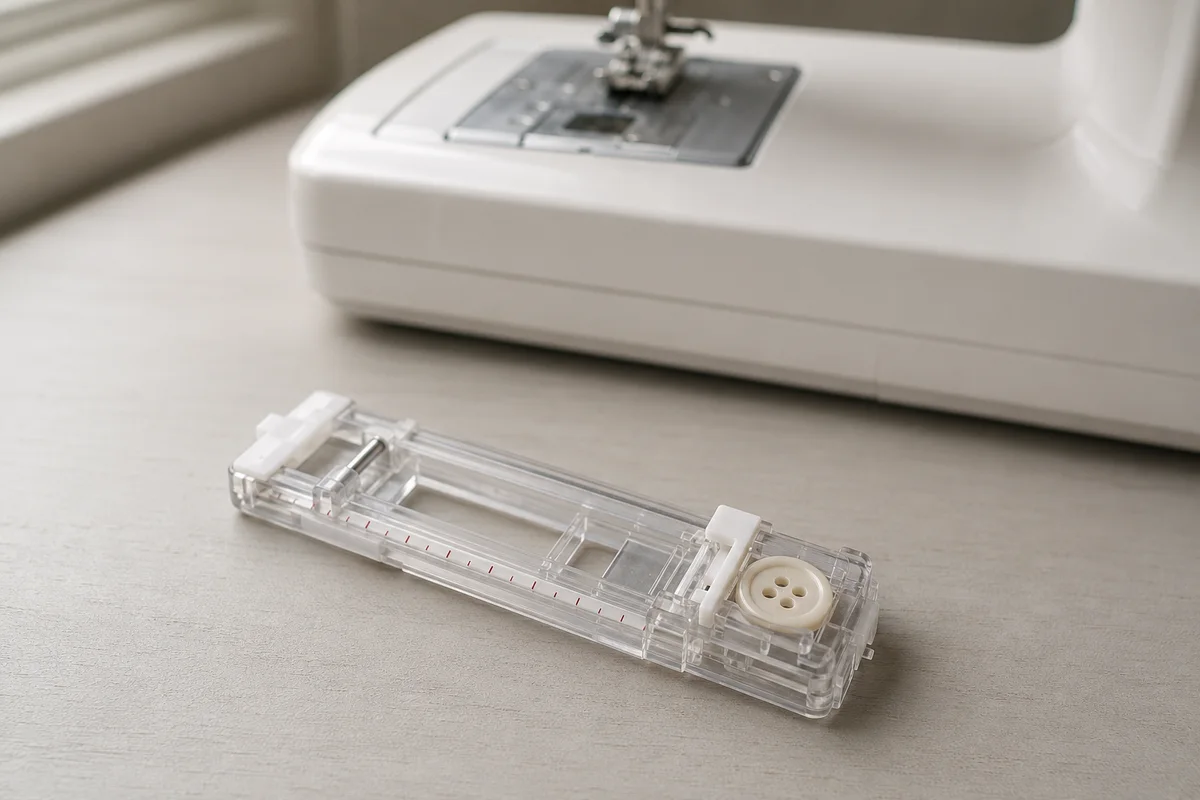
A clear plastic one-step sewing machine buttonhole foot with a white measurement rail and button held in the rear gauge
A one-step buttonhole foot with its sizing gauge. The button sits in the rear holder to establish the opening length, while the clear sliding body helps align the marked starting point. The exact sensing method and attachment design vary by machine.
01

Automatic sensor style

Place the button in the rear holder, lower the buttonhole lever, and allow the machine to complete its programmed sequence.

02

Manual or sliding style

Mark the required length and guide each side and bartack according to the machine’s step sequence.

03

Stabilize before sewing

Interfacing and temporary stabilizer prevent dense thread from distorting the fabric.

Useful distinction

Button thickness changes length

The opening must accommodate both diameter and depth, so unusual buttons always deserve a real sample.

Practical guide

Build a buttonhole the machine can feed consistently

Most poor buttonholes begin with fabric preparation, incorrect sensing, or an unrealistic test. The foot can guide the sequence only when the layers move freely beneath it.

Automatic one-step buttonholes

Place the project beneath the foot with the marked start point aligned to the machine reference. Insert the real button into the rear gauge and pull the buttonhole sensor lever fully down. Do not push the foot or hold the fabric tightly while the machine changes direction.

Four-step and manual systems

Mark both ends of the finished opening. Follow the machine sequence for the first column, lower bartack, return column, and upper bartack. Keep the fabric aligned without changing its relationship to the foot, because each stage relies on the previous line for spacing.

Stabilizing difficult areas

Buttonholes cross several layers and often sit near facings, plackets, and seam allowances. Use the project interfacing plus removable stabilizer when the surface still shifts or tunnels. Grade bulky internal seams and use a height-compensation tool if the foot must climb an abrupt ridge.

Testing size and balance

Make the complete buttonhole on the same fabric, interfacing, thread, and number of layers. Cut the sample and pass the actual button through it. If one column is denser, consult the machine’s buttonhole-balance adjustment rather than changing general tension without evidence.

Avoidable mistakes

What commonly interrupts a buttonhole

  • Testing on a flat scrap when the garment area contains seams and interfacing.
  • Forgetting to lower the sensor lever on a one-step system.
  • Guiding the fabric so firmly that the reverse column cannot feed.
  • Cutting through a bartack because the opening was sliced from one end in a single motion.

Common questions

Buttonhole Foot FAQs

Why does an automatic buttonhole stop halfway?

The sensor lever may be raised, the foot may hit a seam ridge, or fabric may stop feeding.

How much larger should the opening be?

Large enough for the button’s diameter and thickness, confirmed by a test.

Why are the two sides different densities?

Feed balance, drag, stabilizer, or a buttonhole balance setting may differ by direction.

What is the safest cutting method?

Place pins across both bartacks and cut from the center toward each end.