
← Sewing glossary

Machine mechanism

Bobbin Winder

The spindle and thread-guide system that transfers upper thread onto an empty bobbin before sewing.

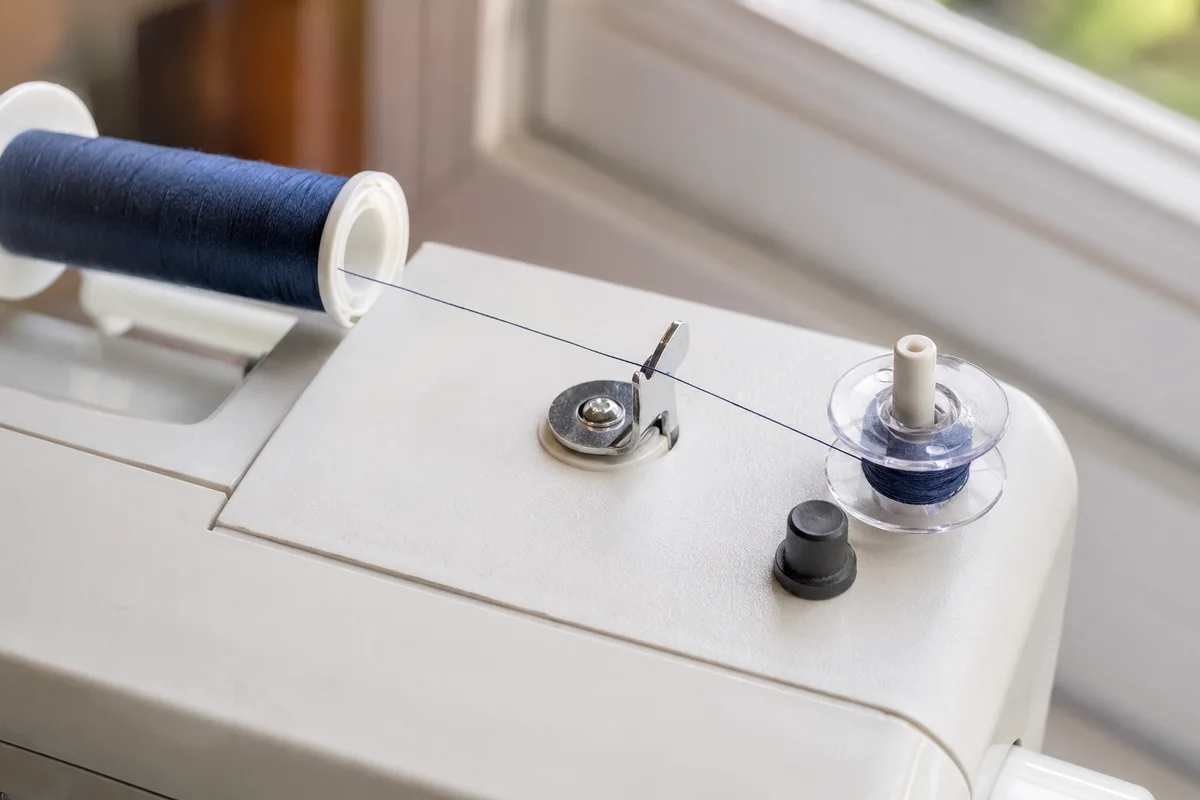
A navy thread spool feeding thread through the guide to a clear bobbin on a domestic sewing machine bobbin-winder spindle
A domestic sewing machine bobbin-winder setup. Thread travels from the main spool through the winding guide before reaching the empty bobbin on the small spindle. The stopper disengages the winding mechanism when the bobbin reaches its intended fill level.
01

Follow the separate thread path

Place the spool and cap correctly, route thread around the marked bobbin-winding guide or tension disc, then pass it through the bobbin hole in the direction shown by the manual.

02

Engage and wind evenly

Seat the bobbin fully and move the spindle or stopper into winding position. Hold the starting tail for the first few turns, stop to trim it, then continue at the recommended speed.

03

Return to sewing mode

Move the winder back to its normal position before stitching. Many machines intentionally disconnect or lock the sewing mechanism while the winding spindle remains engaged.

Useful distinction

Uneven winding is setup evidence

Thread piled on one side usually means the bobbin is not seated, the winding guide was missed, or the thread is not feeding freely from the spool.

Practical guide

Wind a bobbin that feeds consistently from start to finish

Bobbin winding is a separate thread-control operation. The correct path, compatible bobbin, moderate speed, and working stop mechanism determine whether the finished bobbin is firm, level, and safe to use.

Start with the correct empty bobbin

Use the exact bobbin class specified for the machine. Similar diameters can hide differences in height, centre hole, or side profile. Push it fully onto the spindle, secure the starting tail through the indicated hole or around the centre as the manual directs, and engage winding mode before pressing the controller.

Control thread before it reaches the bobbin

Route thread through the dedicated pretension guide rather than the normal needle path. Hold the starting tail only for the first few turns, stop, trim it close, and resume at a moderate speed. The thread should pack firmly without stretching, glazing, or forming loose outer loops.

Correct uneven filling at the source

A cone feeding from the wrong angle, a missed guide, or a guide positioned too high or low can pile thread on one side. Stop before the flange is crossed. Rethread and consult the model instructions for guide adjustment instead of steering thread with a finger near moving parts.

Return the machine fully to sewing mode

Let the automatic stop operate, cut the thread, disengage the spindle, and restore any handwheel clutch. Check that the needle moves normally by turning the handwheel toward you. A machine that appears disconnected after winding is often still in bobbin-winding mode.

Avoidable mistakes

Winding faults that follow the bobbin into the seam

  • Using a nearly matching bobbin can cause rubbing or unstable lower tension.
  • Overfilling lets thread extend beyond the flange and catch inside the case.
  • Winding over leftover thread creates a soft, uneven core.
  • Moving the spindle while the motor is running can damage the drive or cause a snag.

Common questions

Bobbin Winder FAQs

Why does thread wind only on one side?

Check that the bobbin is pushed fully onto the spindle and that thread passes through the correct winding guide. Some older winders have an adjustable guide position.

Why will the machine not sew after winding?

The bobbin-winder spindle or handwheel clutch may still be in winding mode. Return it to the sewing position described in the manual.

Should I fill a bobbin completely?

Let the machine stop at its designed fill level. Overfilling can make the bobbin rub its case or prevent correct insertion.

Can I move the winding spindle while the motor runs?

No. Stop the machine first; shifting a moving mechanism can damage the drive or produce an unsafe snag.